Samsung Galaxy S6 Edge: How to Enable and Use Location Tags Feature in Camera App in Android 5.1.1 Lollipop

Location tags is a feature in the Camera app in Samsung Galaxy S6 Edge that will let you attach geographical location data within each photo that you take or video that you record. However, make sure to use caution when you want to send, share, distribute, or copy photos or videos because they contain with information about where they were taken or recorded.


How to enable the location tags feature in the Camera app?
Assuming that you have an Internet connection(Wi-Fi or mobile data connection) and the location service(GPS) is enabled, you can easily enable the location tags feature in the Camera app by using the following steps:
  1. Open the Camera app. If the quick launch feature is enabled, you can quickly enable the Camera app from any screen by pressing the Home key twice in quick succession.
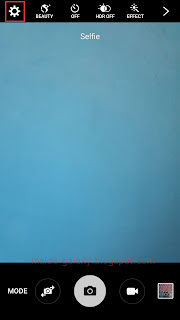
  2. Tap to view the detailed settings for the Camera app.
  3. Slide the ON/OFF switch next to Location tags to the right to enable it.
  4. A pop up window appears to tell you some information about the location tags feature. Tap OK button to continue enabling this feature.
  5. The Location tags feature is enabled.


How to use the location tags feature in the Camera app?
As the example, we'll try using the location tags feature to embed a GPS location tag into a photo by using the following steps:
  1. Open the Camera app.
  2. Aim the camera to the object.
  3. Tap to take a photo.
  4. Tap the preview thumbnail to view the photo in full screen view in the Gallery app.
  5. Tap More at the top right and then select Details.
  6. The location info where you took the photo will be listed in the Location section.

Samsung Galaxy S6 Edge: How to Use Dual Camera Mode in Camera App in Android 5.1.1 Lollipop

Dual camera is a shooting mode that can be used in the Camera app in your Samsung Galaxy S6 Edge that works by using both the rear and front cameras at the same time and then combine both photos taken with those cameras into a beautiful two-sided photo. You can use this mode each time you want to put yourself into a photo you took.


How to download the dual camera mode in the Camera app?
Since this mode is not available by default in the Camera app, you have to download it first from the Galaxy apps by using the following steps:
  1. Open the Camera app. If the quick launch feature is enabled, you can quickly launch the Camera app from any screen by pressing the Home key twice in quick succession.
  2. Tap Mode to view all available modes.
  3. Tap Download to view all available shooting modes in the Galaxy apps that can be installed into your phone.
  4. Tap next to Dual camera to start downloading and installing.
  5. A pop up window appears to inform you some information about the app permissions. Tap Accept and download button to continue the installation process.
  6. Wait until the installation process is completed.


How to take a photo using the dual camera mode in the Camera app?
When the dual camera mode has been installed, you can use it to take a beautiful two-sided photo by using the following steps:
  1. Open the Camera app.
  2. Tap Mode to view all available shooting modes.
  3. Tap Dual camera to enable this mode.
  4. By default, the thumbnail image is taken by the front camera. When needed, you can switch the camera by tapping the thumbnail image or by tapping .
  5. When needed, you can adjust the thumbnail image size by tapping and holding the thumbnail until a white frame appears around it. Drag the edge of the thumbnail to adjust the size.
  6. When needed, you can change the thumbnail image border by tapping the required border available at the left side of the screen (if you hold the phone in portrait view). There are 8 borders available: Stamp(this option is selected by default), Oval blur, Instant pic, Heart shape, Window, Fisheye, Cubism, or Split.
  7. Now, point the rear camera at the subject and face yourself to the front camera lens. Make sure you're not too close and get enough lighting so the camera can easily detect your face.
  8. Tap to take a photo with dual camera mode.
  9. Tap the preview thumbnail to view the photo in full screen view in the Gallery app.

Samsung Galaxy S6 Edge: How to Change Picture Size in Camera App in Android 5.1.1 Lollipop

In the Camera app in your Samsung Galaxy S6 Edge, you're provided with an option that can be used to change the size of photos you take with the rear camera from 2.4MP up to 16MP and the front camera from 0.3MP up to 5.0MP. You can set the size to a higher resolution to have a picture with a higher quality, or you can set it to a lower resolution if you want to have a picture with a smaller size so your storage will not drain quickly.


How to change picture size when using the rear camera in the Camera app?
You can do so by using the following steps:
  1. Open the Camera app. If the quick launch camera feature is enabled, you can quickly launch the Camera app from any screen by pressing the Home key twice in quick succession.
  2. Tap to view the detailed settings of the rear camera.
  3. Tap Picture size (rear).
  4. Select the required picture size you want to use from the following options:
    • 16M (16:9)
    • 12M (4:3)
    • 8.9M (1:1)
    • 8.0M (4:3)
    • 6.0M (16:9)
    • 2.4M (16:9)
  5. The picture size of the rear camera has been changed. As the example, if you set the size to 12M, the width of the image will be 3984 pixels and the height of the image will be 2988 pixels.


How to change picture size when using the front camera in the Camera app?
You can do so by using the following steps:
  1. Open the Camera app.
  2. If it's using the rear camera, tap to switch to the front camera.
  3. Tap to view the detailed settings of the front camera.
  4. Tap Picture size (front).
  5. Select the required picture size you want to use from the following options:
    • 5.0M (4:3)
    • 3.8M (16:9)
    • 3.7M (1:1)
    • 0.3M (4:3)
  6. The picture size of the front camera has been changed. As the example, if you set the size to 3.8M, the width of the image will be 2592 pixels and the height of the image will be 1458 pixels.

Samsung Galaxy S6 Edge: How to Take a 3D Selfie with Virtual Shot Mode in Camera App in Android 5.1.1 Lollipop

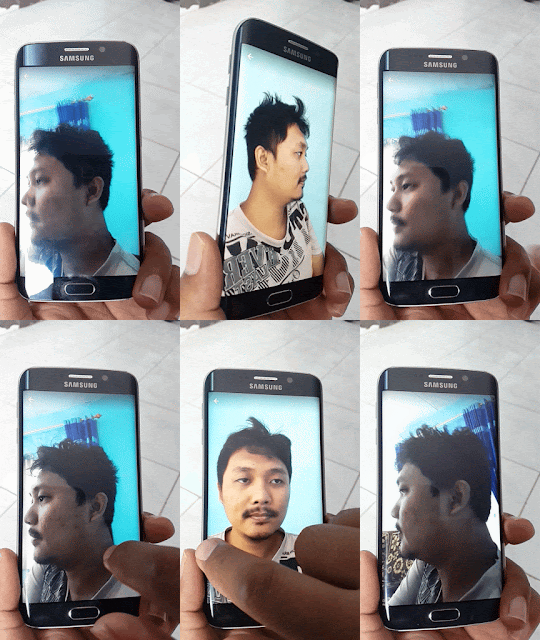
If you're bored with the flat selfie and want to show yourself in a new way, you can use the virtual shot mode in the Camera app in your Samsung Galaxy S6 Edge so you can show yourself in 3D or in 180 degree panorama of your surroundings. When this mode is enabled, the camera will take a series of photos while you're circling the phone around yourself to create multi-directional views of yourself portrait. This mode is best used when you want to show others about your new look in different angles, where you are, what surroundings look like, etc.


How to take a 3D selfie with virtual shot mode in the Camera app?
You can do so by using the following steps:
  1. Open the Camera app. If the quick launch camera feature is enabled, you can quickly launch the Camera app from any screen by pressing the Home key twice in quick succession.
  2. If it's using the rear camera, tap to switch to the front camera.
  3. Tap Mode to view all available shooting modes.
  4. Tap Virtual shot to enable this shooting mode.
  5. Face the front camera lens. Make sure your face is not too close with the camera and gets enough lighting so that it can easily be detected.
  6. Tap to start taking a 3D selfie with virtual shot mode and then move your phone around you slowly in one direction(to left or right).
  7. Keep moving your phone around you while keeping your position centered on the screen until the arrow becomes completely yellow and then your phone will automatically save the photo. Or, you can also manually stop the camera from taking the photo whenever you want by tapping .
  8. Tap the preview thumbnail to view the photo in the Gallery app.
  9. To view your 3D selfie, tap in the middle of the photo. Your phone will rotate all around the image.
  10. If you'd like to view yourself from different angles, drag your finger left or right on the screen, or tilt your phone left or right.

Samsung Galaxy S6 Edge: How to Change Video Size in Camera App in Android 5.1.1 Lollipop

When you're using the camera in your Samsung Galaxy S6 Edge to record a video, you can change the video size of the rear camera from VGA up to UHD and the video size of the front camera from VGA to QHD. You can set the video size to a higher resolution if you want to have a video with a higher quality, or you can set it to a lower resolution if your storage is low and don't want those videos quickly drain the storage. However, you have to remember that if you record a video at high resolution, the maximum recording time may reduce and some features may not available, e.g., HDR, video stabilisation, etc.


How to change the video size when using the rear camera in the Camera app?
You can do so by using the following steps:
  1. Open the Camera app.
  2. Tap to view the detailed settings of the rear camera.
  3. Tap Video size (rear).
  4. Select the required video size you want to use from the following options:
    • UHD (3840x2160)
    • QHD (2560X1440)
    • FHD(60 fps) (1920x1080)
    • FHD (1920x1080)
    • HD (1280x720)
    • VGA (640x480)
  5. The video size of the rear camera has been changed.


How to change the video size when using the front camera in the Camera app?
You can do so by using the following steps:
  1. Open the Camera app.
  2. When it's using the rear camera, tap to switch to the front camera.
  3. Tap to view the detailed settings of the front camera.
  4. Tap Video size (front).
  5. Select the required video size you want to use from the following options:
    • QHD (2560X1440)
    • FHD (1920x1080)
    • HD (1280x720)
    • VGA (640x480)
  6. The video size of the front camera has been changed.