How to enable private mode?
As the example, we'll enable this feature when the screen lock type is set to PIN and fingerprints by using the following steps:
- While the screen is unlocked, swipe down the top of the screen to open up the notification panel and then tap
 at the top right to go to the settings menu.

- Scroll down the screen to find Privacy and safety, and then tap it.

- Tap Private Mode.

- Tap the ON/OFF switch to enable the private mode.

- Place your finger on the fingerprint sensor on the Home key to verify your identity to enable the private mode. If the phone recognises it, the private mode will be enabled and this icon
 will be displayed on the status bar.

- If needed, you can change the access type you want to use to access private mode by using these steps:
- Tap Private mode access type.

- Place your finger on the fingerprint sensor on the Home key to verify your identity so you can change this setting.

- Select the required access type you want to use. You can select from: Pattern, PIN, or Password.

- Follow the on-screen instructions to complete the steps.
- Tap Private mode access type.
- If you're tight with the security issue, you can set your phone to automatically disable the private mode when the screen is turned off by sliding the ON/OFF switch next to Auto disable to the right. The switch turns
 when it's enabled.


How to move or hide contents to Private?
As the example, we'll hide some photos in the Gallery app to Private by using the following steps:
- While the private mode is disabled, open the Gallery app.
- Open an album and then select some photos you want to move to Private.
- Tap More at the top right and then select Move to Private.

- Place your finger on the fingerprint sensor on the Home key to verify your identity to move the selected photos to Private.
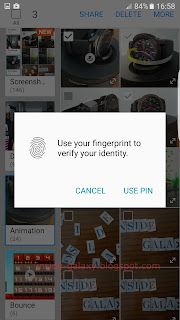
- When your phone recognises your fingerprint, the selected photos will be moved to Private so it can only be seen when private mode is enabled.


How to view hidden or private contents?
As the example, we'll view photos that have been hidden or moved to Private in the Gallery app by using the following steps:
- Open the Gallery app.
- If the Private mode is disabled, you can quickly enable it by swiping down the top of the screen using two fingers to open up the quick settings panel and then tap Private mode button
 .
.

- Place your finger on the fingerprint sensor on the Home key to verify your identity to enable the private mode. If the phone recognises it, the private mode will be enabled and this icon will be displayed on the status bar.

- Now, open Private folder. All photos you have moved to Private will be displayed here.

- When you're finished accessing your private content, you can disable the private mode to keep those contents private by swiping down the top of the screen using two fingers to open up the quick settings panel and then tap Private mode button
 . However, if the auto disable feature is enabled, the private mode will be disabled automatically when the screen is turned off.


How to unhide hidden or private contents?
As the example, we'll remove some hidden photos from Private in the Gallery app by using the following steps:
- Open the Gallery app.
- If the Private mode is disabled, you can quickly enable it by swiping down the top of the screen using two fingers to open up the quick settings panel and then tap Private mode button .
- Place your finger on the fingerprint sensor on the Home key to verify your identity to enable the private mode. If the phone recognises it, the private mode will be enabled and this icon will be displayed on the status bar.
- Open Private folder.
- Select photos you want to unhide.
- Tap More at the top right and then select Remove from Private.

- Select the required album you want to use to place the selected photos removed from Private so it can be seen when private mode is disabled.

- When you're finished accessing your private content, you can disable the private mode to keep those contents private by swiping down the top of the screen using two fingers to open up the quick settings panel and then tap Private mode button . However, if the auto disable feature is enabled, the private mode will be disabled automatically when the screen is turned off.


