How to setup daydream?
You can do so by using the following steps:
- While the screen is unlocked, swipe down the top of the screen to open up the notification panel and then tap
 at the top right to go to the settings menu.
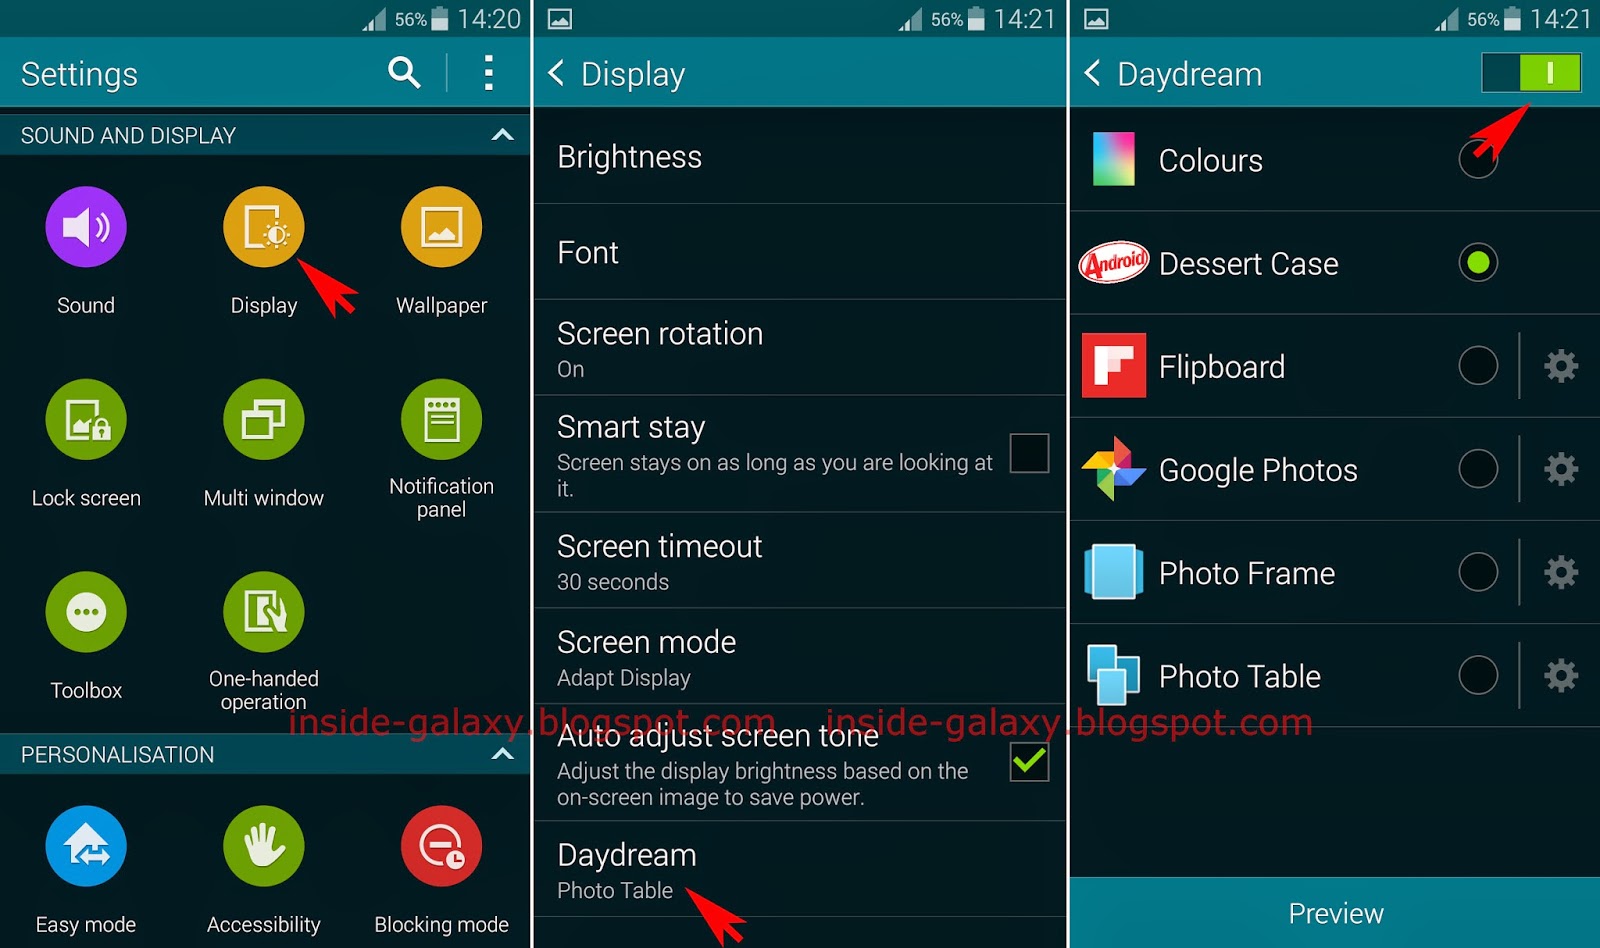
 - Scroll down the screen to the Device section and then tap Display.

- Tap Daydream.

- Slide the ON/OFF switch to the right to enable daydream. The switch turns green when it's enabled.

- When the daydream is enabled, select the desired daydream from the following options:
- Colors: select this option to display the colors change effect as the screensaver.
- Photo Frame: select this option to display a slideshow of photos on your phone as the screensaver. If needed, you can manually select which photos will be displayed as the screensaver by tapping
 and then select the required photo albums.
 - Photo Table: select this option to display photos in your phone with the scattered effect as the screensaver. If needed, you can manually select which photos will be displayed as the screensaver by tapping and then select the required photo albums.
- Photos: select this option to display a slideshow of photos in your phone and/or in your Google account. If needed, you can manually select which photos will be displayed as the screensaver by tapping and then select the required Google account and photo albums in your phone.

- If needed, you can preview the selected daydream by tapping More and then select Preview.

- If needed, you can select the time when daydream should be activated by tapping More at the top right and then select Select when to daydream. Next, select from the following options:
- While docked
- While charging (either AC or USB charging)
- Both (while docked and charging).