How to manage the speed dial feature in the Phone app?
You can do so by using the following steps:
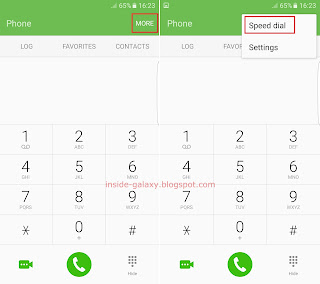
- Open the Phone app.
- Tap More at the top right and then select Speed dial.
- To assign a contact to a speed dial number, do as follows:
- Tap + Add contact next to the required speed dial number.

- Select the required contact you want to assign to the selected speed dial number.

- The selected contact has been assigned to the selected speed dial number.

FYI, you can add up to 999 phone numbers to the speed dial list. For easier usage, you can place your most favourite or important contacts in the top 10 or in the special number to help you easily remember in which speed dial number the contact you want to call is assigned with and avoid you from calling a wrong contact when using the speed dial.
- Tap + Add contact next to the required speed dial number.
- To remove a contact from the speed dial, do as follows:
- If needed, tap
 or
or  at the top of the list to find the required contact you want to remove from the speed dial.
 - Tap
 next to the required contact you want to remove.

- The selected contact has been removed from the speed dial.

- If needed, tap


How to use the speed dial feature in the Phone app?
See the following steps as the example of using this feature:
- Open the Phone app.
If the keypad is hidden, tap
 at the bottom right corner of the screen to show the keypad.
 - To call a single speed dial number, long tap the required speed dial number. As the example, if you have assigned a contact name Albert in the speed dial number "2", long tap 2 on the keypad to have your phone automatically calls Albert.
- To call a multiple speed dial numbers, tap the numbers and then long tap the last number of the required speed dial number. As the example, if you have assigned a contact named Robert in the speed dial number "123", tap 1, tap 2 and then long tap 3 on the keypad to have your phone automatically calls Robert.


