Samsung Galaxy S4: How to Organize Apps in the Applications Menu

Samsung Galaxy SIV has comes with several pre-installed apps to meet the basic needs of the user. But, if you're not satisfied with these pre-installed apps or wants to install another apps, then you can do so easily by downloading and installing the desired apps from the Google Play Store.

See also: How to Download and Install Free Apps from the Google Play Store in Samsung Galaxy S4

You can see and access all installed apps through the application menu. By default, the apps in the application menu are displayed in the customizable 3x4 grid which will place all pre-installed apps in the first place and then the recent installed apps in the next place. The flaws of this default layout is the apps will looks like not organized well and sometimes makes us end up to spend more time to swipe back and forth in the apps menu to find certain apps. So, if you don't like this default, you can change the way of the application menu to arrange all apps by changing the view type option available in here.


How to change view type in the applications menu?
Below are the steps to do so:
  1. Go to Apps through Home screen.
  2. Tap the Menu key then select View type.
  3. You'll see three options available in the pop up menu. They are:
    • Customizable grid: This is the default view type used by the apps menu which will display the apps in the 4x5 grid layout. When you choose this option, you will allowed to rearrange the apps position as your wish as well as add a new page if there's no more room available to place the new installed apps.
    • Alphabetical grid: This option will display the apps in the 4x5 grid alphabetically
    • Alphabetical list: This option will display one app per row in the vertical list alphabetically. When you choose this option, you can jump to another apps easily by tapping the letter category displayed at the right side of the screen, for instance when you tap the letter A then all apps which is beginning with the letter A will be displayed in the screen.
  4. Select the desired view type you wish to use. If the radio button next to the option shows green means the option is selected.
  5. Now, the apps will be sorted according to the view type you've just selected.

As a note, each view type option has their own advantage and disadvantage, so choose the best one that suit your needs. Choose the right view type will help you to improve your experience while you're in the application menu.

Samsung Galaxy S4: How to Enable and Use Air View

The first time Samsung Galaxy SIV was released in the past year, one thing that being the talk of the town of this phone is the new advanced features which are pinned inside it. One of which is the air gesture feature which will allow you to control the phone without actually having to touch the screen. Though this feature is not supports with all apps, but an air gesture icon will be displayed at the top of the screen to inform you when this feature is available.

See also: How to Enable and Use Air Gesture Feature in Samsung Galaxy S4

Another feature which is similar with the air gesture available in this phone is the air view. When you enable this feature, you can preview helpful information in the apps that supports with this features simply by hovering your finger over the screen.


How to enable and use air view?
Below are the steps to do so:
  1. Go to Settings.
  2. Tap My device tab.
  3. Slide the switch next to Air view option to the right to enable this option.
  4. Tap Air view.
  5. Here you'll see some air view features. To enable and use information preview go to the step #6, progress preview go to the step #7, speed dial preview go to the step #8, webpage magnifier go to the step #9, while to enable or disable Sound and haptic feedback go to the step #10.
  6. Enable and use Information preview:
    • Slide the switch next to Information preview to the right to enable this option. Enable this option will allow you to preview information, extend text, or enlarge pictures by hovering your fingers over the screen.
    • Tap Information preview to try to use this feature in the S Planner app, Gallery app and the Messaging app by tapping the Try it button.
  7. Enable and use Progress preview:
    • Slide the switch next to Progress preview to the right to enable this option. Enable this option will allow you to preview a scene or show elapsed time by hovering your fingers over the progress bar.
    • Tap Progress preview and then tap Try it button to try to use this feature while play back the video.
  8. Enable and use Speed dial preview:
    • Slide the switch next to Speed dial preview to the right to enable this option. Enable this option will allow you to preview the contacts assigned to speed dial numbers by hovering your fingers over the keypad.
    • Tap Speed dial preview and then tap Try it button to try to use this feature while using the Phone app.
  9. Enable and use Webpage magnifier:
    • Slide the switch next to Webpage magnifier to the right to enable this option. Enable this option will allow you to magnify the content of the webpages by hovering your fingers over the screen.
    • Tap Webpage magnifier then tap Try it button to try to use this feature while using the Browser app to browse the web.
  10. Enable or disable Sound and haptic feedback:
    Depending on your current settings, tap Sound and haptic feedback to enable or disable this option. When the box next the option is ticked means this option is enabled. Also, enable this option will make the phone to play sound and vibrate when you're hovering your finger over the air view items.

Indeed, the air view is really cool feature but this feature does suspected by lot of users as one of the thing which will causing the battery drained more faster. So, if you're tight with the battery life issue, it'll be better if you only use the air view feature as needed.

Samsung Galaxy S4: How to Adjust Screen Brightness

Aside from going to the Settings menu, the Samsung Galaxy SIV user does allowed to access certain option through the notification panel. By default, there are 10 quick setting buttons in the notification panel which will allow you to quickly enable or disable them and a brightness slider allows you to adjust the screen brightness quickly from there.

See also: How to Customize Notification Panel in Samsung Galaxy S4

In certain case, you might be need to adjust the screen brightness manually to fit it with your situation, such as: you might be need to increase the brightness under the sunlight or decrease the brightness in the brighter environment. You could also decide to turn on automatic brightness to let the phone adjusts the best brightness for the screen.


How to change the screen brightness?
Generally, there are two methods available to do so as listed in the steps below:


Method #1: From the notification panel
  1. Swipe your finger from the top of the screen to the bottom to open up the notification panel.
  2. Slide the brightness slider to the left to decrease the screen brightness or to the right to increase the screen brightness manually. Or, you can also check the box in the left side of the Auto option to enable automatic brightness.


Method #2: From the Settings menu
  1. Go to Settings.
  2. Tap My device tab.
  3. Tap Display.
  4. Tap Brightness.
  5. Slide the brightness slider to the left to decrease the screen brightness or to the right to increase the screen brightness manually. Or, you can also check the box in the left side of the Automatic brightness to enable this option.

FYI, if you turn on the automatic brightness, you may noticed that the screen became more dimmer compared when you turn off this option. It occurs to avoid overheating and to conserve the battery power consumed by the huge screen by reducing maximum brightness.

Samsung Galaxy S4: How to Change Font Style and Size

Change the wallpaper is one of the best way to personalize the phone. This will not only beautify the phone, but also will give it a personal touch which differentiate it with another. You can choose to use the stock wallpaper, live wallpaper and even your own picture as the wallpaper.

See also: How to Change Home Screen or Lock Screen Wallpaper on Samsung Galaxy S4

Aside from changing the wallpaper, you can also change the font style and size used by the device. There are some options available to customize both of them which you can choose the best one suit your personal taste.


How to change font style and size?
Below are the steps to do so:
  1. Go to Settings.
  2. Tap My device tab.
  3. Tap Display.
  4. Scroll down to the Font section. To change the font style go to the step #5, while to change the font size go to the step #6.
  5. Change the font style:
    • Tap Font style.
    • You'll see some default font styles in the pop up menu. They are: Default font, Choco cooky, Coll jazz, Rosemary, Samsung Sans.
    • Select the font style you like best to use.
    • Tap Yes button.
    • The selected font style will be applied to the device.
  6. Change the font size:
    • Tap Font size.
    • You'll see some font size options available in the pop up menu. They are: Tiny, Small, Normal, Large, Huge.
    • Select the font size you like best to use.
    • The selected font size will be applied to the device.

Once you've changed the font style and size, you'll see these changes applied in the menu items, icon names, messaging and other apps, email and web site URL (the content of the email and web site will remain use the default font). Well, which the font style and size you like best to use on your Samsung Galaxy SIV?

Samsung Galaxy S4: How to Customize Notification Panel

In Samsung Galaxy SIV, accessing notification panel by swiping your finger from the top of the screen to the bottom will allow you to enable or disable certain option which is displayed as the quick setting buttons. By default, there are 10 quick setting buttons appears in there. They are likely: Wi-Fi, GPS, Mute/Sound/Vibrate, Screen rotation, Bluetooth, Reading mode, Mobile data, Blocking mode, Power saving and Multi window button.

See also: How to Enable and Use Multi Window Feature in Samsung Galaxy S4

As another thing in this phone, you're also allowed to customize the notification panel, allows you to control which the quick setting buttons you wish to display at the top of the notification panel as well as to display or not the brightness adjustment bar in there.


How to customize notification panel?
Below are the steps to do so:
  1. Go to Settings.
  2. Tap My device tab.
  3. Tap Display.
  4. Tap Notification panel.
  5. Depending on your current settings, tap Brightness adjustment to enable or disable this option. When the box next to the option is checked means the brightness adjustment will be displayed in the notification panel, allows you to adjust the screen brightness from there.
  6. Under Set the quick setting buttons section, you can customize the quick setting button appears at the top of the notification panel. To change quick setting buttons go to the step #7, to remove quick setting buttons go to the step #8, to add quick setting button go to the step #9, while to rearrange quick setting button go to the step #10.
  7. Change quick setting buttons
    By default, there are 10 quick setting buttons displayed at the top of the notification panel. If you don't like these default, you can change them to the desired quick setting button by following the steps below:
    • Tap and hold the desired quick setting button in the notification panel section and then drag it to the quick setting button you wish to change with in the available buttons section or vice versa.
    • Release to exchange them.
  8. Remove quick setting buttons
    If you want to remove certain quick setting button from the notification panel, then you can do so by following the step below:
    • Tap and hold the desired quick setting button you wish to remove in the notification panel section and then drag it to the blank spot in the available buttons section.
    • Release to remove the quick setting button.
    • Removed quick setting button will be a blank spot which will allow you to add another quick setting button later.
  9. Add quick setting buttons
    You can do this if there's a blank spot available in the notification panel section. Well, here's the step:
    • Tap and hold the desired quick setting button in the available buttons section and then drag it to the blank spot in the notification panel section.
    • Release to add it to the notification panel.
  10. Rearrange quick setting buttons
    To reorder the position of the quick setting buttons in the notification panel, kindly do as follows:
    • Tap and hold the desired quick setting button in the notification panel section and then drag it to another quick setting button in the same section.
    • Release to exchange their position.
  11. If you want to reset edited notification panel and go back to the default settings, tap Reset button and then tap OK button.

As a note, this will be more useful if you places the most frequently used quick setting button in the notification panel to make you more easier and faster when you want to enable or disable them.

Samsung Galaxy S4: How to Hide, Move and Edit Multi Window

Lot of tasks to be done at this time made us should do everything faster. That's why the ability to do multiple tasks in the same time is being the one thing needed by most of everyone. Luckily, by using the Samsung Galaxy SIV, you can do so with ease. Moreover, this phone has pinned with the enhanced multitask feature called multi window which is not only will allow you to do multiple tasks in the same time but also displaying two apps in the same screen.

See also: How to Enable and Use Multi Window Feature in Samsung Galaxy S4

Once you enable multi window, you'll see a half circle icon which you can use to access multi window tray contains apps that support with this feature. To suit your need, you're allowed to hide and move that icon, even you do allowed to control which apps you wish to display in the multi window tray.


How to hide multi window icon?
By default, you'll see a half circle icon in the left middle of the screen. But, if you don't want that icon be displayed there without having to turn off the multi windows then you can do so by long tapping the Back key. To bring back the icon, long tap the Back key again.


How to move multi window tray?
By default, the multi window tray is used to reside in the left middle of the screen. But, you can move the tray to the right side by following the steps below:
  1. Tap and hold the half circle icon and then drag it to the right side of the screen.
  2. Release to placed it.
  3. The multi window tray will be moved.


How to edit displayed apps in multi window tray?
If the default apps displayed in the multi window tray are not suit with your needs, then you can easily to remove unwanted apps from the tray, add additional apps that support with this feature into the tray and even you can reorder the position of the apps by following the steps below:
  1. Tap the half circle icon to open up the multi window tray.
  2. Tap Edit button.
  3. Here you'll see another additional apps that support with the multi window displayed in the outside of the tray. To remove apps from the tray go to the step #4, to add apps into the tray go to the step #5, while to rearrange the apps position in the tray go to the step #6.
  4. Remove apps from the multi window tray:
    • Tap and hold the desired app you wish to remove from the tray and then drag it out.
    • Release to remove the app.
    • The selected app will be removed from the tray.
  5. Add apps into the multi window tray:
    • Tap and hold the desired app you wish to add from the additional apps panel and then drag it to the tray.
    • Release to add it.
    • The selected app will be added into the tray.
  6. Rearrange apps position:
    • Tap and hold the desired app in the tray that you wish to change its position and then drag it to another app in the tray.
    • Release to exchange their position.
  7. Tap Done button to save the changes.

Well, once you know how to customize the multi window feature by using the steps mentioned above, now you can easily control to display or not the multi window icon, change the position of the multi window tray and even editing the apps displayed in the tray per your needs. So, hope this helps :)

Samsung Galaxy S4: How to Enable and Use Multi Window Feature

The ability to do more than one task or we used to refer it as the multitasking is one of best thing that you can do with most of smartphone available today, including with the Samsung Galaxy SIV. Moreover this phone has equipped with the powerful processor which will allow you do multitask smoothly and as easy as when you do multitask with your personal computer.

See also: How to Multitask and Remove All Running Applications in the Samsung Galaxy S4

To deliver a better multitask experience for the user, this phone does has the enhanced multitask feature called multi window. This feature will allow you to open two different apps at once by splitting the screen into two windows, allows you to browse the webs while watching a video as the example.


How to enable or disable multi window feature?
There are two methods available to do so as listed below:


Method #1: From the notification panel
  1. Swipe two fingers from the top of the screen to the bottom to bring up the quick panel.
  2. Depending on your current settings, tap Multi window icon to enable or disable this option. When the icon shows green means the option is turned on.
  3. Now, you should see a half circle icon in the left middle or the right middle of the screen which you can use to open up the multi window tray. If you don't see the icon, long tap the Back key to bring up the multi window tray.


Method #2: From the Settings menu
  1. Go to Settings.
  2. Tap My device tab.
  3. Tap Display.
  4. Check the box next to Multi Window option to enable this option.
  5. Now, you should see a half circle icon in the left middle or the right middle of the screen. If you don't see the icon, long tap the Back key to bring up the multi window tray.


How to use multi window feature?
Once you activated the multi window feature on your phone, now you can use this feature by following the steps below:
  1. Tap the half circle icon to bring up the multi window tray. Or, if you don't see the icon, you can do so by long tapping the Back button.
  2. Tap and hold the desired app from the multi window tray then drag it to the main screen.
  3. To add the second app, tap and hold another app from the multi window tray then drag it to the top or the bottom of the screen if the phone is held vertically, or drag it to the left or the right of the screen if the phone is held horizontally.
  4. Now, you should see the screen splits into two windows and opening two apps you just selected.
  5. Tap and hold the separator bar in the middle of the screen and then drag it to the top or to the bottom to resize the window of the active apps if you hold the phone vertically, or drag it to the left or to the right to resize the window of the active app if you hold the phone horizontally.
  6. Tap the arrow icon in the middle of the separator bar to see more option of the multi window, such as:
    • Flip icon (): tap this option to swap the position between two apps, the top app became the bottom app and vice versa.
    • Full screen icon (): tap this option to view active app in full screen.
    • Close icon (): tap this option to close active app.

FYI, not all apps supports with this feature. If the app is supported with this feature, then the app will show up in the multi window panel or tray.

Samsung Galaxy S4: How to Multitask and Remove All Running Applications

Samsung Galaxy SIV has equipped with set of powerful hardware and software as well as the useful features inside it which will be able to provide the better experience for the user while using this phone, including to do more than one task or commonly referred as the multitask easily and smoothly as when you do so with your personal computer. This ability does allow you to jump between active apps and complete the multiple tasks in the same time, for example you can write an email while waiting the Google Play Store updating your apps.


How to use multiple app?
Below are the steps to do so:
  1. Open the desired app, either from the Home screen or from the application menu.
  2. While the app is open, tap the Home key to close the app and keep it running in the background.
  3. Now, open another apps.
  4. To jump between active apps, long tap the Home key until the active apps list is displayed and then tap the desired app you wish to open.
  5. The selected app will be opened.

How to remove certain or all running apps?
Some apps remain active in the background even when we already closed them. To completely close the active apps, you can follow the steps below:
  1. Long tap the Home key until the active apps list is displayed.
  2. To close certain app, swipe away the desired app you wish to close. The app will be removed from the list.
  3. To close all running apps, tap remove all icon located at the bottom right corner of the screen. All apps will be removed from the list.

By knowing how to use the multitask ability, now you can use it to help you completing multiple tasks with your Samsung Galaxy SIV more easier and faster. And you does be able to close all active apps you use while multitasking easily by using the step above which will also help you to free up some memory in the phone.

Samsung Galaxy S4: How to Enable and Use Air Gesture

Most of you must be agree to say that the Samsung Galaxy SIV is a great Android-based smartphone. This phone is equipped with the powerful hardware and software as well as the advanced features which will certainly be able to improve the user experience of using the high-end Android-based smartphone.

See also: Samsung Galaxy S4 Specifications and Features

One of the advanced feature which has pinned inside this phone is the air gesture. This feature will let you to control your phone by using a specific movement with your hand above the sensor, allows you to do so without having to actually touch the screen. You'll see the air gesture icon at the top of the screen when this feature is available.


How to enable and use air gesture feature:
There are some gestures available under the air gesture menu which you can enable and configure by using the steps below:
  1. Go to Settings.
  2. Tap My device tab.
  3. Scroll down to find Motions and gestures, then tap it.
  4. Slide the switch next to Air gesture to the right to enable this option.
  5. Tap Air gesture.
  6. Here you will see some gestures available. To enable and use quick glance go to the step #7, air jump go to the step #8, air browse go to the step #9, air move go to the step #10 and air call-accept go to the step #11.
  7. Enable and use Air glance:
    • Slide the switch next to Air glance to the right to enable this option. Enable this option will allow you to display status information by moving your hand above the sensor when the screen is turned off and the device is on a flat surface with the display facing upward.
    • Tap Air glance.
    • Check the box next to available option you wish to display on the information screen. They are: Time & Date, Notification icons, Missed calls, Unread messages, Battery power, and Current music info.
  8. Enable and use Air jump:
  9. Slide the switch next to Air jump to the right to enable this option. Enable this option will allow you to scroll through the web pages and the body of emails by moving your hand up or down above the sensor.
  10. Enable and use Air browse:
    • Slide the switch next to Air browse to the right to enable this option. Enable this option will allow you to move between pictures, pages or music tracks by moving your hand to the left or to the right above the sensor.
    • Tap Air browse.
    • Check the box next to the supported apps available you wish to use with Air browse. They are: Gallery, Internet, Music Player, Music on lock screen, and S Memo.
  11. Enable and use Air move:
    Slide the switch next to Air move to the right to enable this option. Enable this option will allow you to move icons to other screen by tapping and holding them with your finger and then move your another hand to the left or to the right above the sensor. This feature is available on the Home screen, applications list, and S Planner app.
  12. Enable and use Air call-accept:
    • Slide the switch next to Air call-accept to the right to enable this option. Enable this option will allow you to accept incoming calls by moving your hand over the sensor.
    • Tap Air call-accept.
    • Here you will see an option named Auto start speakerphone which is turned on by default. This option will automatically activate the speakerphone when the call is answered. You can clear the checkbox next to this option to disable this option.

FYI, in this phone, the air gesture sensor is located at the top right corner above the screen. To make these features works, make sure your gesture is smooth and steady up to three inches above the sensor. So, which the gesture you like best to use?

Samsung Galaxy S4: How to Change Lock Screen Effect

Locking the screen is the best standard way to secure the phone from unauthorized people accessing the phone, especially if you use the high-security unlock methods, such as PIN or password. Unfortunately, using these high-security unlock methods does limited the options which you can use to customize the lock screen.

See also: How to Unlock the Samsung Galaxy S4 Lock Screen

The different thing happens when you use swipe methods which is the low-security unlock method to unlock the screen, this methods will provide you more options to customize the lock screen than another. One of the option available when you use swipe is the lock screen effect. These effects will be played whenever you swipe your finger to unlock the screen. But, if you prefer to use the plain lock screen effect then you can easily do so by turning off the lock screen effect option.


How to enable or disable lock screen effect?
Kindly follow the steps listed below to turn on or turn off the lock screen effect:
  1. Go to Settings.
  2. Tap My device tab.
  3. Tap Lock Screen.
  4. If necessary, tap Screen lock then select Swipe.
  5. Tap Unlock effect.
  6. Here you will see three options available, they are:
    • None: choose this option to not using or to turn off the lock screen effect.
    • Ripple effect: choose this option to use water drop like effect when you swipe your finger to unlock the screen.
    • Light effect: choose this option to use light effect when you swipe your finger to unlock the screen.
  7. Choose the lock screen effect you wish to use. When the radio button next the option shows green means the option is selected.
  8. Press the Power key twice to go to the lock screen.
  9. The selected lock screen effect with the sound will follow the movement of the fingers when you swipe it to unlock the screen.

For some users, this option is quite interesting to use. But, not for some others. Due to this option is just an extra option to beautify your phone and has no real function, so you're free to use this option or not.

Samsung Galaxy S4: How to Add, Remove and Rearrange Lock Screen

There are some unlock methods available in the Samsung Galaxy SIV, from the low-security unlock methods up to the high-security unlock methods. But, you may be noticed when you use the swipe method to unlock the screen then you'll have lot of options that you can use to customize the lock screen. One of which is to display up to 12 favourite apps in the lock screen. The best part of this is that you can control which the apps you wish to display in there, allows you to put your own favourite apps if these default are not fit with you.

See also: How to Add or Remove Favourite Apps in the Samsung Galaxy S4 Lock Screen

By default, this phone supports up to five lock screen that you can customize per your needs, such as remove unused lock screen, add new additional lock screen or even change the lock screen position. Two of the lock screen are the standard lock screen which are usually reside in the right side. One is the lock screen that provide access to your missed call or messaging notification, while the other one is the lock screen that provide access to the favourite apps or the camera app.


How to remove additional lock screen?
For any reason, if you want to delete the additional lock screen then you can follow the steps listed below:
  1. Press the Power key twice to go to the lock screen.
  2. Swipe the near top area of the lock screen from left to the right until the desired lock screen you wish to remove is displayed.
  3. Tap and hold the widget until the edit screen is displayed and then drag it to the Trash can icon located at the top of the screen.
  4. Release to delete it.


How to add additional lock screen?
Once you remove one or more lock screen, then you'll be allowed to add the additional lock screen again up to five lock screen. To do so, kindly follow the steps listed below:
  1. Press the Power key twice to go to the lock screen.
  2. Swipe the near top area of the lock screen from left to the right until the blank lock screen with the Plus sign is displayed. As a note, the blank lock screen with the Plus sign will not available if you already have added five lock screen.
  3. Tap the Plus sign to add new widgets you wish to display in the new lock screen.
  4. Select the widgets from the list.
  5. The new widgets in the new lock screen will be added.


How to rearrange lock screen position?
If you want to change the lock screen position, then you can follow the steps listed below:
  1. Press the Power key twice to go to the lock screen.
  2. Swipe the near top area of the lock screen from left to the right until the desired lock screen you wish to move is displayed.
  3. Tap and hold the widget until the edit screen is displayed and then drag it to the left or to the right to rearrange the lock screen. As a note, the lock screen with the Favourite apps can't be moved or replaced with another lock screen so this lock screen will always reside at the rightmost.
  4. Release to place it in the new position.

As same as the Home screen, this will be better if you only use the lock screen as needed to prevent an increase of the RAM uses and make sure to only place the favourite widgets in there to make it more useful and helpful for you.

Samsung Galaxy S4: How to Add or Remove the Favourite Apps in the Lock Screen

The multiple widgets is one of the option available that you can use to customize your Samsung Galaxy SIV lock screen. Once you enable this option, then you can configure to display the favourite apps or camera and also clock or personal message when the phone is locked. You'll get all these options when you use the swipe methods to unlock the screen.

See also: How to Enable and Customize Multiple Widgets in Samsung Galaxy S4 Lock Screen

Well, when you choose to display the favourite apps in the lock screen, you can easily access these favourite apps by swiping the near top area in the lock screen from right to left. If you swipe your finger in the middle of the lock screen usually it will unlock the screen instead of allow you to access the additional lock screen. From here, you just need a single tap to open the available app. This of course will provide you the easiness to access these apps. Luckily, you can also add another apps available into these favourite apps as well as removing unused or unwanted app from there, giving you a control to decide which apps you wish to display in there when the default are not fit with you.


How to add new favourite app in the lock screen?
FYI, you're allowed to display up to 12 apps in the favourite apps in the lock screen. Here are the steps to do so:
  1. Press the Power key twice to go to the lock screen.
  2. Swipe the near top area in the lock screen from right to the left until the customizable lock screen is displayed.
  3. Here you can see the favourite apps screen.
  4. Tap Add app icon.
  5. Select the desired app you wish to add.
  6. The selected app will be added to the favourite apps in the lock screen.

How to remove one or more favourite apps in the lock screen?
If you don't like the default favourite apps, then you can easily to remove them by following the steps below:
  1. Press the Power key twice to go to the lock screen.
  2. Swipe the near top area in the lock screen from right to the left until the customizable lock screen is displayed.
  3. Tap the Edit icon .
  4. Tap the Minus circled icon in the edge of each apps to remove the app. Removed app will be replaced with the Add app icon to allow you add the new app.
  5. Tap the Checkmark icon to save the changes.

In my opinion, the favourite apps has the same function with the bottom shortcuts on the lock screen. Both of them will allow you to easily access your favourite apps by two easy steps, swipe and a single tap. Well, I hope this helps :)

Samsung Galaxy S4: How to Enable and Customize the Multiple Widgets on Lock Screen

For the security reason, the Samsung Galaxy SIV has comes with several options available that you can use to lock the screen. Depending on your needs, you're free to use the low-security unlock methods or high-security unlock methods. By locking the screen especially with the high-security unlock methods, you'll be helped to secure your phone from unauthorized people for accessing your phone.

See also: How to Unlock Samsung Galaxy S4 Lock Screen

From all of the option available to unlock the screen, the swipe is the standard unlock methods which is usually has been enabled by default. Though the security of using this method is low, but while you're using the swipe option you'll get lot of options available to customize your lock screen, one of which is the multi widgets.


How to enable or disable the multiple widgets on lock screen?
Below are the steps to do so:
  1. Go to Settings.
  2. Tap My device tab.
  3. Tap Lock screen.
  4. Depending on your current settings, tap Multiple widgets option to enable or disable this option. When the box next this option is checked means the multiple widgets will be displayed in the lock screen.


How to customize favourite apps or camera on lock screen?
Once you've enable the multiple widgets as mentioned in the step above, now you can set to display the favourite apps or camera in the lock screen by following the steps below:
  1. Go to Settings.
  2. Tap My device tab.
  3. Tap Lock screen.
  4. Tap Lock screen widgets.
  5. If necessary, slide the switch next to Favourite apps or Camera to the right to enable this option.
  6. Tap Favourite apps or Camera.
  7. You can select either to use Favourite Apps or Camera. When the radio button next the option is shows green means the option is selected.
  8. Tap Save button.
  9. The changes will be saved.
  10. To access the favourite apps or camera, swipe the default lock screen from right to left.


How to customize clock or personal message on lock screen?
Here you can also set to display clock or personal message in the lock screen by following the steps below:
  1. Go to Settings.
  2. Tap My device tab.
  3. Tap Lock screen.
  4. Tap Lock screen widgets.
  5. Tap Clock or personal message.
  6. You can select either to use Clock or Personal message. When the radio button next the option is shows green means the option is selected. Tap Save button.
  7. If you choose the Clock then go to the step #8 while if you choose Personal message then go to the step #9.
  8. There are some options available if you choose Clock, such as:
    • Dual clock: tap the switch next to this option to enable or disable dual clock on lock screen when roaming.
    • Clock size: tap this option to change the clock size.
    • Show date: tap this option to display or not to display the date in the lock screen.
    • Owner Information: tap this option to type your own information. Make sure to check the box in the left side of the "Show owner info on lock screen" to display this option in lock screen and then tap OK button.
  9. If you choose Personal message:
    • Tap Edit personal information.
    • Type your own personal information. You can also change the colours of the text and background of the text as well as the font style in here
    • To display or not to display the the time and date in the lock screen, check or uncheck the box next the option. When the box is checked means the time and date will be displayed in the lock screen.
    • Tap Save button to save the changes.

Not only to customize the lock screen widgets, you can also use these three steps to speed up the way you accessing the favourite apps or camera as well as to optimize the lock screen function by displaying the widgets per your needs in there.

Samsung Galaxy S4: How to Unlock Lock Screen

Customizing the five shortcut of the favourite apps displayed at the bottom of the lock screen is one of the way that the user can do to speed up the way to access these apps when the phone is locked. Nonetheless, you can easily change which the app shortcuts you wish to display there if these default are not fit with you. But, you should use the swipe methods to unlock the screen in order to make them displayed in the lock screen.

See also: How to Customize the Bottom Shortcuts in the Samsung Galaxy S4 Lock Screen

Another customizable thing in the lock screen is the way you unlock the screen. There are some methods available in this phone, from the low-security unlock methods(eg. swipe or face unlock) up to high-security unlock methods(eg. PIN or password). More higher the security of the unlock methods you use will also help you much better to prevent unauthorized people accessing your phone.


How to unlock the screen?
Below are the steps to do so:
  1. Go to Settings.
  2. Tap My device tab.
  3. Tap Lock screen.
  4. Tap Screen lock.
  5. Here you can see some unlock methods available, they are:
    • Swipe: choose this option to unlock the screen by swiping your finger in the screen. This option also has lot of options that you can use to customize lock screen (eg. lock screen effect or bottom shortcuts).
    • Face unlock: choose this option to unlock the screen by placing your face in the front of the front-facing camera.
    • Face and voice: choose this option to unlock the screen by placing your face in the front of the front-facing camera and also says a predefined word.
    • Pattern: choose this option to unlock the screen by drawing a predefined pattern.
    • PIN: choose this option to unlock the screen by typing the 4-digits PIN numbers.
    • Password: choose this option to unlock the screen by typing the predefined password.
    • None: choose this option to unlock the screen by pressing the Power key.
  6. Tap the desired unlock methods you wish to use and then follow the on-screen instruction to complete the activation.

Once you have completed configuring the unlock methods, now whenever the phone is locked you can unlock the screen by using that selected method. For the record, the comfort is inversely related to the security means the higher security you use, the lower comfort you get and vice versa. So, it'll be better if you choose the unlock method depends on your top priority: the security or the comfort.

Samsung Galaxy S4: How to Customize the Bottom Shortcuts in the Lock Screen

If you noticed, while you in any Home screen, there are five shortcuts of the favourite apps which are always displayed in the bottom of the screen. The main purpose of the bottom shortcuts list is to speed up the user to access these apps. Luckily, you can choose which apps you want to display there if you don't like these default shortcuts.

See also: How to Customize the Bottom Shortcuts List in the Samsung Galaxy S4 Home Screen

As same as the Home screen, in the lock screen there are also five favourite app shortcuts that you can find in the bottom of the screen while your phone is locked. They are likely the Phone, Messaging, Internet, Camera and Contacts app. And of course you're allowed to customize these bottom shortcuts list, such as add, remove, rearrange or even change the shortcuts in the list per your wish.


How to add, remove, rearrange and change the bottom shortcuts in the lock screen?
FYI, the bottom shortcuts in the lock screen only will be displayed if you use the swipe methods to unlock the screen. Well, here are the complete steps to customize the bottom shortcuts in the lock screen:
  1. Go to Settings.
  2. Tap My device tab.
  3. Tap Lock screen.
  4. Tap Shortcuts.
  5. Slide the switch next to Shortcuts option at the top of the screen to the right to display the bottom shortcut in the lock screen. When the switch is highlighted means the option is turned on.
  6. Here you can customize the default bottom shortcuts of the lock screen. To remove the existing shortcuts go to the step #6, to add new shortcut go to the step #7, to rearrange the shortcuts position go to the step #8 and to change the existing shortcuts go to the step #9.
  7. How to remove the existing lock screen shortcut:
    • Tap and hold the desired shortcut you wish to remove and then drag it to the Trash can icon located in the bottom of the screen.
    • Release to delete it.
    • The selected shortcut will be deleted.
  8. How to add new shortcut to the lock screen shortcuts:
    • Once you remove one or more shortcuts as listed in the step #6, then you'll see the available spot with the Plus circled icon which will allow you to add the new shortcut.
    • Tap the Plus circled icon to add new shortcut.
    • Select the desired app.
    • The shortcut of the selected app will be added.
  9. How to rearrange position of the lock screen shortcuts:
    • Tap and hold the desired shortcut you wish to change its position and then drag it to the desired position.
    • Release to place the shortcut in the new position.
  10. How to change the lock screen shortcuts:
    • Single tap in the desired shortcut you wish to change.
    • Select the desired app.
    • The selected app will replace the existing one.

Once the phone is locked, you'll see the new customization of the bottom shortcuts in the lock screen that you have made is displayed. And of course, this will also more useful if you place your favourite apps or the most frequently used app in there to allow you accessing them more faster and easier, even when your phone is locked.

Samsung Galaxy S4: How to Change the Default Home Screen

As one of the customizable part in the Samsung Galaxy SIV, the Home screen in this phone is allowed you to add the new Home screen, remove one or more Home screen or even rearrange its position per your wish to suit your needs. But, use the Home screen as needed is the better choice to prevent an increase of the RAM uses which may led some problems to your phone.

See also: How to Add, Remove and Rearrange Samsung Galaxy S4 Home Screen

If you noticed, in some Home screen available in the phone, one of them will always appear whenever you turn on the phone. This Home screen is the default Home screen which is usually has the clock or weather widget at the top of the screen. Luckily, you're free to assign another Home screen as the default if you don't like the previous one.


How to set a Home screen as the default screen?
Below are the steps to do so:
  1. In the Home screen, tap the Menu key then select Edit page. Or, you can also pinch the Home screen to enter the edit page.
  2. The default Home screen is the one with the highlighted Home icon.
  3. To change the default, tap the Home icon at the top of the desired Home screen you wish to set as the default.
  4. When the Home icon is highlighted means the selected Home screen has been activated as the default.

Now, whenever you turn on the phone, you'll see the new default Home screen appear. FYI, one thing that differentiates between the default Home screen and another additional Home screen is when you remove the default then you'll be presented with the notification to ask you whether you really want to delete or not. So, this will more useful if you choose the Home screen which is contain more important apps or widgets than another because this will be able to help you to prevent accidentally removing the Home screen while you're in the edit page to customise all of your Home screen.

Samsung Galaxy S4: How to Add, Delete and Rearrange Home Screen

Adding app shortcuts to the Samsung Galaxy SIV Home screen is one of the way that you can do to make you more faster and easier to access your favourite apps or the most frequently used apps. As we all know, by default, all of newly installed apps will automatically add the shortcut to the Home screen, but if you don't want them displayed there, then of course you can easily to remove them from the Home screen.

See also: How to Add or Remove Apps or Widgets in the Samsung Galaxy S4 Home Screen

Aside from the ability to control which the apps or widgets you wish to display in the Home screen, here you're also have the ability to customize the Home screen itself, including add the Home screen up to seven, remove the unused Home screen or even to re-arrange the position of the Home screen.


How to add new Home screen?
By default, you might be seen that there are only five Home screen. Actually, you're allowed to add additional Home screen up to seven Home screen if these five are not enough to meet your need. Well, there are two methods available to add the new Home screen that you can choose which best suit your need:
Method #1
  1. In the Home screen, tap the Menu key then select Edit page. Or, you can also pinch the Home screen to enter the edit page.
  2. Tap the blank page with the Plus (+) sign inside to add a new Home screen.
  3. The new Home screen will be added.
Method #2
  1. Long tap in the Home screen.
  2. On pop up menu select Page.
  3. The new Home screen will be added.

How to delete Home screen?
For any reason, if you want to remove one or more additional Home screen, then you can do so by following the steps listed below:
  1. In the Home screen, tap the Menu key then select Edit page. Or, you can also pinch the Home screen to enter the edit page.
  2. Tap and hold the desired Home screen you wish to delete and then drag it to the Trash can icon located at the top of the screen.
  3. Release to delete it.
  4. The selected Home screen will be deleted.

How to re-arrange Home screen?
If you wish to arrange the Home screen position, then you can do so by following the steps below:
  1. Tap the Menu key then select Edit page. Or, you can also pinch the Home screen to enter the edit page.
  2. Tap and hold the desired Home screen you wish to arrange and then drag it to to the desired position.
  3. Release to change its position.
  4. The selected Home screen will be placed in the new position.

Well, these are the steps that you can use to customize your Home screen to suit with your need. But, it'll be wise if you only use Home screen as needed because use lot of Home screen may increase the RAM uses. But, if you really need to use all of the them, then you're absolutely free to do so.

Samsung Galaxy S4: How to Change Wallpaper

Home screen is one of the customizable part of the Samsung Galaxy SIV. In here, you can control and decide which the apps or widgets you wish to display, allows you to put the most frequently used apps or widgets here to speed up the way you access them whenever you want. Moreover, the ability to group some apps into a single folder will of course be able to increase the numbers of the apps and widgets you could display in here.

See also: How to Create a New Folder in Samsung Galaxy S4 Home Screen

Another things that you can do to customize the Home screen is by changing its background image, or we used to call it as the Home screen wallpaper. Most of users use this way to give the personal touch to their phone to differ it with others, or even to reflect who's they are. Aside from the Home screen, you can also change the lock screen wallpaper as easy as the way you do with the Home screen.


How to change lock screen wallpaper?
Kindly follow the steps listed below to change the background image displayed when your phone is locked:
  1. In the Home screen, tap the Menu key then select Set wallpaper. Or, long tap in the Home screen then select Set wallpaper.
  2. On pop up menu select Lock screen.
  3. In the Select wallpaper from menu, you'll see some options available such as:
    • Gallery: choose this option to set your own picture in the Gallery as the lock screen wallpaper.
    • Travel Wallpaper: choose this option to use the picture from the TripAdvisor app.
    • Wallpapers: choose this option to pick up the stock Samsung wallpaper as the lock screen wallpaper.
  4. If you choose Gallery go to the step #5, Travel wallpaper go to the step #6 while if you choose Wallpapers go to the step #7.
  5. Set wallpaper from the Gallery:
    • Select your own picture in the Gallery app you wish to use as the lock screen wallpaper.
    • If necessary, you can adjust the blue frame in the picture to the right or to the left to crop the desired part of the picture you wish to display.
    • Tap Done button.
  6. Use the picture from the travel wallpaper:
    • Tap Slideshow interval.
    • Choose the interval you wish to use.
  7. Set wallpaper using the stock Samsung wallpaper:
    • Select the stock wallpaper you wis to use as the lock screen wallpaper.
    • Tap Set wallpaper button.
  8. The selected image will be set as the lock screen wallpaper.

How to change Home screen wallpaper?
Kindly follow the steps listed below to change the background image displayed when your phone is in the standby mode:
  1. In the Home screen, tap the Menu key then select Set wallpaper. Or, long tap in the Home screen then select Set wallpaper.
  2. On pop up menu select Home screen.
  3. In the Select wallpaper from menu, you'll see some options available such as:
    • Gallery: choose this option to set your own picture in the Gallery as the Home screen wallpaper.
    • Live wallpapers: choose this option to pick up the stock Samsung live wallpaper as the Home screen wallpaper.
    • Photos: choose this option to use the picture from the Photos as the Home screen wallpaper.
    • Wallpapers: choose this option to pick up the stock Samsung wallpaper as the Home screen wallpaper.
  4. If you choose Gallery go to the step #5, Live wallpapers go to the step #6, Photos go to the step #7 and Wallpapers go to the step #8.
  5. Set wallpaper from the Gallery:
    • Select your own picture in the Gallery app you wish to use as the Home screen wallpaper.
    • If necessary, you can adjust the blue frame in the picture to the right or to the left to crop the desired part of the picture you wish to display.
    • Tap Done button.
  6. Set live wallpaper as the Home screen wallpaper:
    • Select the desired live wallpaper you wish to use.
    • Tap Set wallpaper button.
  7. Use picture from Photos as the Home screen wallpaper:
    • Select the desired image from the Photos.
    • Adjust the bright part to the top or to the bottom to crop the desired part of the picture you wish to display.
    • Tap Save button.
  8. Set wallpaper using the stock Samsung wallpaper:
    • Select the stock wallpaper you wish to use as the Home screen wallpaper.
    • Tap Set wallpaper button.
  9. The selected image will be set as the Home screen wallpaper.

How to change Lock screen and Home screen wallpaper at once?
If you wish to use the same wallpaper in the lock screen and the Home screen, then kindly to follow the steps below to do so in the same times:
  1. In the Home screen, tap the Menu key then select Set wallpaper. Or, long tap in the Home screen then select Set wallpaper.
  2. On pop up menu select Home and lock screen.
  3. In the Select wallpaper from menu, you'll see some options available such as:
    • Gallery: choose this option to set your own picture in the Gallery as the Home and lock screen wallpaper.
    • Live wallpapers: choose this option to pick up the stock Samsung live wallpaper as the Home and lock screen wallpaper.
    • Wallpapers: choose this option to pick up the stock Samsung wallpaper as the Home and lock screen wallpaper.
  4. If you choose Gallery go to the step #5, Live wallpaper go to the step #6 and Wallpapers go to the step #7.
  5. Set wallpaper from the Gallery:
    • Select your own picture in the Gallery app you wish to use as the Home and lock screen wallpaper.
    • If necessary, you can adjust the blue frame in the picture to the right or to the left to crop the desired part of the picture you wish to display.
    • Tap Done button.
  6. Set live wallpaper as the Home and lock screen wallpaper:
    • Select the desired live wallpaper you wish to use.
    • Tap Set wallpaper button.
  7. Set wallpaper using the stock Samsung wallpaper:
    • Select the stock wallpaper you wis to use as the Home and lock screen wallpaper.
    • Tap Set wallpaper button.
  8. The selected image will be set as the lock screen wallpaper.

Well, these are the available methods to change the image background in the Lock screen and the Home screen that you can chose one of them to personalize your phone. So, what kind of the wallpaper you like best to use in your Samsung Galaxy SIV?

Samsung Galaxy S4: How to Create a New Folder in the Home Screen

One of the customizable thing in the Samsung Galaxy SIV Home screen is the bottom shortcuts list. You can add, delete or change that five default apps icon in there with those you like to suit your need. And of course, it will more useful if you place your most favourite apps or the most frequently used apps in there to speed up your way to access all of them when you want to use them.

See also: How to Customize the Bottom Shortcut in the Samsung Galaxy S4 Home Screen

Indeed, by default there are only five spots available in the bottom shortcuts list, but by adding the new folder you could increase the numbers of the apps icon that you can place in there. Aside from creating the new folder in the bottom shortcuts list, you can also use this method to organize the apps icon in all of the Home screen by grouping them into a single folder per category you want.


How to add new folder in the bottom shortcuts list?
Below are the steps to do so:
  1. In the Home screen, tap and hold one of the apps icon in the bottom shortcuts list and then drag it to the Create folder icon located at the top of the screen.
  2. Release to create new folder.
  3. Type the name for the new folder and then tap OK button.
  4. The selected apps icon now reside in the new folder you just created.
  5. You can add another apps--either from the bottom shortcuts list or from the Home screen-- into this folder by tapping and holding the apps and then drag it to the folder followed by releasing it to place it into the new folder.


How to add new folder in the Home screen?
There are three methods available to do so which you can choose the one that best suit you.
Method #1
  1. In the Home screen, tap the Menu key and then select Create folder.
  2. Type the name of the new folder.
  3. Tap and hold the desired app--either from the bottom shortcuts list or from the Home screen-- and then drag it to the new folder you just created.
  4. Release to place the app into the new folder.
  5. To add more apps into the new folder, repeat from the step #3.

Method #2
  1. Long tap in the Home screen.
  2. In the pop up menu select Folder.
  3. Type the name of the new folder.
  4. Tap and hold the desired app--either from the bottom shortcuts list or from the Home screen-- and then drag it to the new folder you just created.
  5. Release to place the app into the new folder.
  6. To add more apps into the new folder, repeat from the step #4.

Method #3
  1. Tap and hold one of the app icon in the Home screen and then drag it to the Create folder icon located at the top of the screen.
  2. Release to create new folder.
  3. Type the name for the new folder and then tap OK button.
  4. The selected apps icon now reside in the new folder you just created.
  5. You can add another apps--either from the bottom shortcuts list or from the Home screen-- into this folder by tapping and holding the apps and then drag it to the folder followed by releasing it to place it into the new folder.

Well, if you're like me, organizing some apps which has the similar function (eg. you could create "Browser" folder to group all the browser app you have) into a single folder will help you to manage the app icon in the bottom shortcuts list and in the Home screen as well as to increase the ability to add more apps icon in there. By using the methods mentioned above, now you can add more than five apps icon in the bottom shortcut list and also simplify your Home screen and decreasing the numbers of the additional Home screen by grouping some apps into a single folder. Well, hope this helps :)

Samsung Galaxy S4: How to Customize the Bottom Shortcuts in the Home Screen

The common method used by the Samsung Galaxy SIV user to speed up their way to access certain app is by adding the shortcut of that app to the Home screen. That's might be the explanation why the Google Play Store has the default settings to add the newly installed app shortcut to the Home screen--if there's an available room--. You're also free to remove the unused app shortcuts in the Home screen or the one that you don't want to be there, allows you to control which app shortcuts you wish to reside on your Home screen.

See also: How to Add or Remove Apps or Widgets to the Samsung Galaxy S4 Home Screen

While you on the Home screen, you would see the five favourite app shortcuts in the bottom. By default, they are likely the Phone, Contacts, Messaging, Internet and Apps which are the most frequently used apps by most of the users. But, if that default doesn't fit with your needs, then you can easily customize them by adding, removing or changing one of them or more to suit your needs.


How to add, remove or change the favourite shortcuts on Home screen?
You can do so by following the steps listed below:
  1. To add shortcut to the bottom shortcuts list:
    • In order to allow you to add app shortcut to the bottom shortcuts, then the apps should be available in the Home screen. If not, first you need to add the app to the Home screen. If you don't know how to do so, you can see the complete steps in the link mentioned above
    • Add the app shortcut to the bottom shortcuts by tapping and holding the app on your Home screen then drag it to available space in the bottom shortcuts list.
    • Release to placed it.
  2. To remove shortcut from the bottom shortcuts list:
    • Tap and hold the bottom shortcut you wish to remove.
    • If you want the shortcut still remain in the Home screen, drag it to the available space in one of the Home screen and then release to placed it.
    • If you want the shortcut no longer displayed in the Home screen, drag it to the Trash can icon located at the top of the screen and then release to delete it.
  3. To change the shortcut in the bottom shortcuts list:
  4. There two methods that you can choose to change the bottom shortcuts. They are:
    • Remove the bottom shortcut first (see in the step #2) and then add the new shortcut to the bottom shortcuts (see in the step #1).
    • Tap and hold the apps in the Home screen and then drag it to the one of existing bottom shortcut. Release to exchange their position.

Given to the main purpose of the bottom or favourite shortcuts in the Home screen is to speed up the way you access those five apps, then it will be more useful if you place your most favourite apps or your most frequently used apps in there. So, hope this helps :)

Samsung Galaxy S4: How to Add or Remove Apps or Widgets in the Home Screen

Indeed, the Samsung Galaxy SIV has comes with the several pre-installed apps to meet the user needs. You can use all of them directly without you need to install it first by yourself. But, in certain case with any reason, you might be not satisfied with them or wants to install another apps to meet your needs. If so, you can easily do that by downloading and install the desired apps from the Google Play Store into your phone.

See also: How to Download and Install Free Apps from the Play Store in Samsung Galaxy S4

By default, the Google Play Store will add the newly installed apps icon to the Home screen in order to make you more easier when you want to access the apps. Moreover, the Samsung Galaxy SIV also supports up to seven Home screen that would be capable enough to accommodate lot of apps or widgets icon.


How to add shortcut of the apps or widgets to the Home screen?
If the apps has no icon in the Home screen or if you wants to add certain app or widget to the Home screen, then you can easily do so by following one of the steps listed below:
Method #1: From the app drawer
Before you do this steps, make sure you have room enough in the Home screen to allow you add new apps or widget icon
  1. Go to Apps through the Home screen.
  2. To add apps go to the step #3, while to add widgets go to the step #4.
  3. Add apps to the Home screen
    • Tap Apps tab.
    • Tap and hold the desired app and then drag it to the Home screen.
    • Release to placed it.
  4. Add Widgets to the Home screen
    • Tap Widgets tab.
    • Swipe the screen to the right or to the left to find the desired widget.
    • Once you find the required one, tap and hold the widget and then drag it to the Home screen.
    • Release to placed it.
    • If necessary, follow the on-screen instruction to complete the steps of adding the widgets.
  5. The selected app or widget will be added to the Home screen.
Method #2: From the Home screen
Before you do this steps, make sure you have room enough in the Home screen to allow you add new apps or widget icon.
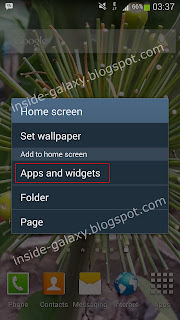
  1. In the Home screen, tap the Menu key then select Add apps and widgets. Or, long tap in the Home screen, then in the pop up menu select Apps and widgets.
  2. To add apps go to the step #3, while to add widgets go to the step #4.
  3. Add apps to the Home screen
    • Tap Apps tab.
    • Tap and Hold the desired app and then drag it to the Home screen.
    • Release to placed it.
  4. Add widget to the Home screen
    • Tap Widgets tab.
    • Find the desired widget by swiping the screen to the left or to the right.
    • Once you find the desired widget, tap and hold the widget and then drag it to the Home screen.
    • Release to placed it.
    • If necessary, follow the on-screen instruction to complete the steps of adding the widgets.
  5. The selected app or widget will be added to the Home screen.


How to remove shortcut of the apps or widgets from the Home screen?
If you want to clean up your Home screen or don't want certain apps or widgets icon resides there, then you can easily remove the icon from the Home screen by following the steps below:
  1. Locate the icon you wish to remove from the Home screen.
  2. Once you find the icon, tap and hold the icon and then drag it to the Trash can icon located at the top of the screen.
  3. Release to remove the icon.
  4. The selected icon will be removed from the Home screen.

Adding certain apps or widgets icon to the Home screen is one of the way to speed up you accessing them. But, too much apps or widgets scattered in the Home screen will make the Home screen in a mess and of course this will also increase the RAM uses (especially those with the animation inside). So, it will be wise if you only add the important or the most frequently used apps or widgets to the Home screen and remove the unused apps or widgets from there to keep your Home screen clean and reduce the RAM uses. Well, hope this helps :)

Samsung Galaxy S4: How to Attach Any File Types into Email Message in Gmail App

Samsung Galaxy SIV has comes with some pre-installed apps to meet the basic needs of the users. One of which is Gmail app which will let you to send or receive email message with others. This ability of course will make you more easier to communicate with others by using email messages. Moreover, this app also has the default ability to allow you to attach picture and video files into your Gmail message.

See also: How to Create and Send Email Message With or Without Attachment Using Gmail App in Samsung Galaxy S4

However, in certain case, you might want to send another file types other than the picture or video files by attaching them into your email message. Indeed, by default Gmail app only allows you to attach picture and video files, but with the help of the third-party File Manager app, now you have the ability to attach any file types into your Gmail messages.


How to attach any file types into Gmail message?
There are several third-party File Manager app available in the Google Play Store, but as the example we'll use the popular one, ES File Explorer app. Well, here are the steps:
  1. Download install ES File Explorer app from the Play Store and then follow the on-screen instruction to complete the installation.
  2. Now, open Gmail app.
  3. Tap Create new email button.
  4. Type the required contact and the subject of the email message in the provided field.
  5. Type your email message in the Compose email field.
  6. Tap the Menu key and then feel free to select either Attach picture or Attach video.
  7. Tap ES File Explorer.
  8. Navigate to the folder where the files you wish to send is saved.
  9. Choose the way you want to use to attach the file. There are two options available that you can choose the one that best suit your need. They are:
    • Normal Android Way (For MMS, Gmail,...)
    • File Way (Try this if above fails)
  10. The selected file will be attached and the email message is ready to be sent by tapping the Send button.

In certain case, utilizing the third-party app to complete the ability of the stock app will be useful to help you optimizing the app performance. And also, by knowing this steps, now you're free to attach any file types into your Gmail message and then send the email to the contact you want. Well, hope this helps :)

Samsung Galaxy S3: How to Fix Can't Find the Wi-Fi Direct Option on Android 4.3

In Android 4.3, there are some options that changed its location in the Settings menu causing some users are having trouble to find them when they want to use them. As happen with one of the insider named Maureen who has the difficulty to change the Bluetooth name in her phone after she did update the phone to the Android 4.3. She said that she couldn't find the rename option in the Bluetooth menu, where the option is usually located. Apparently, in the recent update you have to change the device name to change the Bluetooth name.

See also: How to Fix Can't Change the Bluetooth Name on Samsung Galaxy S3 with the Android 4.3

Another problem with the similar causes also experienced by another insider named Richard who has send me an email and said that he could no longer find the Wi-Fi Direct option in the Settings menu when he want to activate this option to allow him transferring some stuff to another phone.


How to find Wi-Fi Direct option in Android 4.3?
FYI, in Android Jelly Bean 4.2 and above, the Wi-Fi Direct has been moved to the Wi-Fi menu. Well, here are the steps to locate the Wi-Fi Direct option:
  1. Go to Settings.
  2. Tap My Connections tab.
  3. If necessary, slide the switch next to Wi-Fi option to the right to enable this option and allows you accessing the menu.
  4. Tap Wi-Fi Direct button.
  5. Tap Scan button to search another Wi-Fi Direct enabled device within range.
  6. Now, you're ready to use Wi-Fi Direct to transfer files with another Wi-Fi direct enabled devices.

Indeed, the appearance of the Settings menu in the Android ICS and the Android Jelly Bean(especially the Android 4.3) has some differences. So, digging the Settings menu to explore each option available is one things that you might consider to do to know the Settings menu more better. Well, hope this helps :)