Showing posts with label Video. Show all posts

Samsung Galaxy S4: How to Delete Videos from a Windows Computer via Windows Explorer App

When your phone is connected to your Windows PC and being explored using Windows Explorer app, you can easily delete videos stored in your phone from this app to remove unwanted videos from your phone or to free up some space in your phone. If needed, you can backup your videos by transferring videos to your PC via Windows Explorer app before permanently deleting them from your phone.

------------------------------------
Disclaimer: this post is written based on Samsung Galaxy S4 GT-I9500 runs with Android 5.0.1 Lollipop and the computer uses Windows 7 Professional 32-bit as the operating system.
------------------------------------

How to delete videos stored in Samsung Galaxy S4 with Android 5.0.1 Lollipop from a Windows computer via Windows Explorer app?
As the example, we'll delete all videos stored in the DCIM\Camera folder in the internal storage of Samsung Galaxy S4 from a Windows PC via Windows Explorer app by using the following steps:
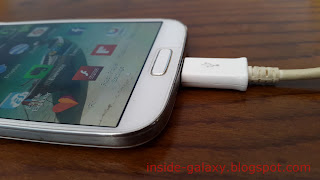
  1. Connect your phone to the computer using the provided USB cable by plugging the micro USB connector to the micro USB port in your device (it's located under the Home key) and the USB connector to a USB port on your PC. If it's the first time for you to connect your phone with the PC, your PC may need a few minutes to install the driver. By default, your phone will use MTP as the connection mode.
  2. When the phone has been successfully connected to your PC and is ready to use, a pop up window will appear on your computer. Click Open device to view files to automatically explore your phone in the Windows Explorer.
  3. Navigate to the DCIM\Camera folder in the internal storage of your phone by using these steps:
    • In the Windows Explorer app, click the Phone folder to explore the internal storage of your phone.
    • Click the DCIM folder.
    • Click the Camera folder. FYI, it's the default folder used to save all videos recorded by the stock Camera app.
  4. Since the DCIM\Camera folder contains with photos and videos, you can make it easier by sorting the files by its type. You can do so by clicking the right-mouse button and then hover the cursor above the Sort by and then select Type. Now, select all videos (those with .mp4 file extensions) within this folder.
  5. Delete the selected videos by pressing the Delete key in your PC's keyboard, or by clicking the right-mouse button and then select Delete.
  6. Click the Yes button to confirm deleting videos.
  7. All videos within DCIM\Camera folder in the internal storage of your phone will be deleted permanently.
  8. Once done, close the Windows Explorer app and then you can disconnect your phone from the PC by unplugging the USB cable from your phone and your PC.

Samsung Galaxy S4: How to Transfer Videos to a Windows Computer via Windows Explorer App

Transferring videos stored in your phone to other storage or devices periodically to backup them is a preventive thing that can be done to avoid you lose them since you can use the backup to retrieve videos when you accidentally lose them from your phone for whatever reason. If you have a Windows computer, you can transfer the videos from your phone to your PC by using the Windows Explorer app. You can use this way if you don't like transferring multimedia files from your phone to PC by using Samsung Kies 3 app.

------------------------------------
Disclaimer: this post is written based on Samsung Galaxy S4 GT-I9500 runs with Android 5.0.1 Lollipop and the computer uses Windows 7 Professional 32-bit as the operating system.
------------------------------------

How to transfer videos from Samsung Galaxy S4 with Android 5.0.1 Lollipop to a Windows computer via Windows Explorer app?
As the example, we'll copy and move all videos stored in the DCIM\Camera folder in the internal storage of Samsung Galaxy S4 to a Windows PC via Windows Explorer app by using the following steps:
  1. Connect your phone to the computer using the provided USB cable by plugging the micro USB connector to the micro USB port in your device (it's located under the Home key) and the USB connector to a USB port on your PC. If it's the first time for you to connect your phone with the PC, your PC may need a few minutes to install the driver. By default, your phone will use MTP as the connection mode.
  2. When the phone has been successfully connected to your PC and is ready to use, a pop up window will appear on your computer. Click Open device to view files to automatically explore your phone in the Windows Explorer app.
  3. Navigate to the DCIM\Camera folder in the internal storage of your phone by using these steps:
    • In the Windows Explorer app, click the Phone folder to explore the internal storage of your phone.
    • Click the DCIM folder.
    • Click the Camera folder. FYI, it's the default folder used to save all videos recorded by the stock Camera app.
  4. Since the DCIM\Camera folder contains with photos and videos, you can make it easier by sorting the files within this folder by its type. You can do so by clicking the right-mouse button and then hover the cursor above the Sort by then select Type. Now, select all videos (those with .mp4 file extensions).
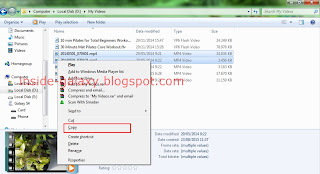
  5. If you'd like to copy the videos, use the keyboard shortcuts Ctrl+C, or click the right-mouse button and then select Copy. While, if you'd like to move the videos, use the keyboard shortcuts Ctrl+X, or click the right-mouse button and then select Cut.
  6. Now, navigate to a folder in your PC where you want to copy/move the selected videos and then paste them by using the keyboard shortcuts Ctrl+V, or click the right-mouse button and then select Paste.
  7. The videos will be copied or moved from the DCIM\Camera folder in the internal storage of your phone to the selected folder in your PC.
  8. Once done, close the Windows Explorer app and then you can disconnect your phone from the PC by unplugging the USB cable from your phone and your PC.

Samsung Galaxy S4: How to Add Videos from a Windows Computer via Windows Explorer App

If you'd like watching videos or movies stored in your Windows PC directly from your Samsung Galaxy S4, you have to transfer them first into your phone while it's being connected to your PC. You can easily transfer the required videos from your PC to your phone by using Windows Explorer app. This can be an alternative way if you don't like using Samsung Kies 3 app to transfer multimedia files between your phone and PC.

------------------------------------
Disclaimer: this post is written based on Samsung Galaxy S4 GT-I9500 runs with Android 5.0.1 Lollipop and the computer uses Windows 7 Professional 32-bit as the operating system.
------------------------------------

How to add videos from a Windows Computer to Samsung Galaxy S4 with Android 5.0.1 Lollipop via Windows Explorer App?
As the example, we'll copy some videos from a Windows PC to a new folder in the SD card in Samsung Galaxy S4 via Windows Explorer app by using the following steps:
  1. Connect your phone to the computer using the provided USB cable by plugging the micro USB connector to the micro USB port in your device (it's located under the Home key) and the USB connector to a USB port on your PC. If it's the first time for you to connect your phone with the PC, your PC may need a few minutes to install the driver. By default, your phone will use MTP as the connection mode.
  2. When your phone has been successfully connected to your PC and is ready to use, a pop up window will appear on your computer. Click Open device to view files to automatically explore your phone in the Windows Explorer app.
  3. Create a new folder in the SD card in your phone to save the videos by using the following steps:
    • In the Windows Explorer app, click the Card folder to explore the SD card of your phone.
    • Click the right-mouse button and then select New folder.
    • Enter the required name for the new folder and then press the Enter key in your PC's keyboard.
    • Click the folder you have just created to open it.
  4. Copy the required videos in your Windows PC by using the following steps:
    • Open a new Windows Explorer app and then navigate to the folder in your Windows computer where the videos you want to add to your phone are placed in.
    • Select the required videos and then copy them by using the keyboard shortcuts Ctrl+C, or click the right-mouse button and then select Copy.
  5. Paste copied videos into your phone by using the following steps:
    • Open the Windows Explorer app that you use to create a new folder in the SD card in your phone (see the step #3).
    • To paste the copied videos, use the keyboard shortcuts Ctrl+V, or click the right-mouse button and then select Paste.
    • The selected videos will be copied from your PC to your phone. Wait until the process is completed.
  6. Once done, close all Windows Explorer apps and you can disconnect your phone from the PC by unplugging the USB cable from your phone and your PC.
  7. Now, you can enjoy watching the videos that you have just added in your Samsung Galaxy S4 by using the stock Video Player app or any third-party Video Player app.

Samsung Galaxy S4: How to Delete Videos from a Windows Computer via Samsung Kies 3 App

While your Samsung Galaxy S4 is being connected to a Windows PC, you can alternatively delete unwanted videos stored in your phone by using Samsung Kies 3 app. If you'd like to backup your videos first, you can also use Samsung Kies 3 app to transfer your videos to your PC before deleting them.

------------------------------------
Disclaimer: this post is written based on Samsung Galaxy S4 GT-I9500 runs with Android 5.0.1 Lollipop and the computer uses Windows 7 Professional 32-bit as the operating system.
------------------------------------

How to delete videos in Samsung Galaxy S4 with Android 5.0.1 Lollipop via Samsung Kies 3 app in a Windows computer?
As the example, we'll delete all videos stored in the DCIM\Camera folder(it's the default folder used to save all videos recorded by the stock Camera app) in the internal storage of Samsung Galaxy S4 via Samsung Kies 3 app by using the following steps:
  1. Connect your phone to the computer using the provided USB cable by plugging the micro USB connector to the micro USB port in your device (it's located under the Home key) and the USB connector to a USB port on your PC. If it's the first time for you to connect your phone with the PC, your PC may need a few minutes to install the driver. By default, your phone will use MTP as the connection mode.
  2. When your phone has been successfully connected to your PC, launch Samsung Kies 3 app in your computer. If you have not installed this app yet, you can download it here and then install it in your computer.
  3. Samsung Kies 3 app will connect to your phone automatically.
  4. In the Kies screen, click Videos located at the left side menu to view all videos stored in your phone. By default, those videos will be grouped by the date.
  5. Click the By folder tab to group your videos by the folder.
  6. Click the box in the left side of the INTERNAL:\DCIM\Camera to select all videos stored in the DCIM\Camera folder in the internal storage of Samsung Galaxy S4, and then click at the top of the Kies screen.
  7. Click the Delete button to confirm deleting the selected videos.
  8. All videos in the DCIM\Camera folder in the internal storage of your phone will be deleted permanently.
  9. Once done, you can disconnect your phone from Samsung Kies 3 app by clicking in the right side of the device name in the Kies screen. Then, you can disconnect your phone from the PC by unplugging the USB cable from your phone and your PC.

Samsung Galaxy S4: How to Transfer Videos to a Windows Computer via Samsung Kies 3 App

The combination between 13MP rear camera, 2MP front camera and set of useful features inside the stock Camera app in Samsung Galaxy S4 will let you to easily capture your precious moment into a good quality video. However, in order to prevent you from losing those videos(e.g: when you have accidentally deleted a video in your phone), periodically backup your videos to other storage or devices is something important to do. If you have a Windows PC, you can easily making backup for your videos by transferring them to your PC via Samsung Kies 3 app.

------------------------------------
Disclaimer: this post is written based on Samsung Galaxy S4 GT-I9500 runs with Android 5.0.1 Lollipop and the computer uses Windows 7 Professional 32-bit as the operating system.
------------------------------------

How to transfer videos from Samsung Galaxy S4 with Android 5.0.1 Lollipop to a Windows computer via Samsung Kies 3 app?
As the example, we'll copy all videos stored in DCIM\Camera folder in the internal storage of Samsung Galaxy S4 to a Windows PC via Samsung Kies 3 app by using the following steps:
  1. Connect your phone to the computer using the provided USB cable by plugging the micro USB connector to the micro USB port in your device (it's located under the Home key) and the USB connector to a USB port on your PC. If it's the first time for you to connect your phone with the PC, your PC may need a few minutes to install the driver. By default, your phone will use MTP as the connection mode.
  2. When your phone has been successfully connected to your PC, launch Samsung Kies 3 app in your computer. If you have not installed this app yet, you can download it here and then install it in your computer.
  3. Samsung Kies 3 app will connect to your phone automatically.
  4. In the Kies screen, click Videos located at the left side menu to view all videos stored in your phone. By default, your videos will be grouped by the date.
  5. In the right frame of the Kies screen, click By folder tab to group your videos by the folder.
  6. Click the box in the left side of the INTERNAL:\DCIM\Camera to select all videos stored in the DCIM\Camera folder in the internal storage of your phone and then click at the top of the Kies screen.
  7. Select a folder in your PC and then click the Select Folder button to save the selected videos to the selected folder. FYI, the more videos you transfer to your PC, the longer the time it takes to complete the transfer process.
  8. When the transfer process is completed, you can disconnect your phone from Samsung Kies 3 app by clicking in the right side of the device name in the Kies screen. Then, you can disconnect your phone from the PC by unplugging the USB cable from your phone and your PC.

Samsung Galaxy S4: How to Add Videos from a Windows Computer via Samsung Kies 3 App

If you'd like to watch videos or movies stored in your Windows PC directly from your Samsung Galaxy S4, you have to connect your phone with your Windows PC first and then add the required videos into your phone by using Samsung Kies 3 app.

------------------------------------
Disclaimer: this post is written based on Samsung Galaxy S4 GT-I9500 runs with Android 5.0.1 Lollipop and the computer uses Windows 7 Professional 32-bit as the operating system.
------------------------------------

How to add videos from a Windows computer to Samsung Galaxy S4 with Android 5.0.1 Lollipop via Samsung Kies 3 app?
You can do so by using the following steps:
  1. Connect your phone to the computer using the provided USB cable by plugging the micro USB connector to the micro USB port in your device (it's located under the Home key) and the USB connector to a USB port on your PC. If it's the first time for you to connect your phone with the PC, your PC may need a few minutes to install the driver. By default, your phone will use MTP as the connection mode.
  2. When your phone has been successfully connected to your PC, launch Samsung Kies 3 app in your computer. If you have not installed this app yet, you can download it here and then install it in your computer.
  3. Samsung Kies 3 app will connect to your phone automatically.
  4. In the Kies screen, click Videos located at the left side menu. All videos in your phone, either those in the internal storage or in the SD card, will be displayed here.
  5. Tap at the top of the Kies screen and then select Internal memory if you'd like to add the videos to the DCIM\Camera folder in the internal storage of your phone, or select External memory if you'd like to add the videos to the DCIM\Camera folder in the SD card.
  6. Navigate to the folder in your Windows PC where the videos you want to add to the phone are placed in.
  7. Select the required videos you want to add to your phone and then Click the Open button.
  8. The selected videos will be added to your phone.
  9. Once the process is completed, you can disconnect your phone from Samsung Kies 3 app by clicking in the right side of the device name in the Kies screen. Then, you can disconnect your phone from the PC by unplugging the USB cable from your phone and your PC.
  10. Now, you can watch the videos you have added in your phone by using the stock Video Player app or other third-party Video Player apps.

Samsung Galaxy S5: How to Change Recording Mode in Android 4.4.2 Kitkat

By default, the stock Camera app uses normal as the recording mode. This recording mode will let you record videos with normal quality. But, if needed you can change the recording mode according to your need. You'll be provided with 5 recording modes. Since each of the recording modes has their own advantage, select the right recording mode will give you a better result.


How to change recording mode in the stock Camera app?
You can do so by using the following steps:
  1. Open the stock Camera app.
  2. Tap to open up the detailed settings menu.
  3. Tap Recording mode and then select from the following options:
    • Normal: this option is enabled by default. Select this option if you want to record the video with normal quality.
    • Limit for MMS: select this option if you want to decrease the quality of the video to allow you send the video via messaging. This mode limits the video up to 295K.
    • Slow motion: select this option when you record a video of a moving object and want the device plays the video in slow motion. You can set the slow motion value to: x1/2, x1/4 or x1/8. As the example, if you choose x1/4 then the device will play the video four times slower than the actual.
    • Fast motion: select this option when you record a video of a moving object and want the device plays the video in fast motion. You can set the fast motion value to: x2, x4 or x8. As the example, if you choose x4 then the device will play the video four times faster than the actual.
    • Smooth motion: select this option to get a better result when you record a video of a fast moving object.
  4. The recording mode has been changed.

As a note, the feature to take photos whilst recording videos is only available in normal mode while the zoom function can only be used in normal mode, limit for MMS mode and smooth mode.

Samsung Galaxy S5: How to Take Photos Whilst Recording Video in Android 4.4.2 Kitkat

Whilst recording a video, there are some scenes that may be good if captured as photos. Luckily, the stock Camera app lets you easily take photos whilst recording the video so that you can still continue recording the video and capture the desired scenes. Since taking photos whilst recording video is a default feature, you can directly use this feature without you have to set anything first.


How to take a photo whilst recording a video in the stock Camera app?
You can do so by using the following steps:
  1. Open the stock Camera app.
  2. Aim the camera to the object.
  3. Tap to start recording video, or say "Record video" if you have enabled the voice command feature for recording videos, or press the Volume key if you have set the Volume key as the video-recorder key.
  4. Whilst recording video, you can take a photo by tapping . FYI, you can tap this icon to take more photos whilst recording video.
  5. Tap to end recording, or press the Volume key if you have set this key as the video-recorder key.

Samsung Galaxy S5: How to Record Video Using the Volume Key in Android 4.4.2 Kitkat

By default, the Volume key in the stock Camera app is set as the zoom key that can be used to adjust the zoom level. But, if needed you can assign this key to other functions, one of which is as the video-recorder key. Set the Volume key as the video-recorder key will let you start and end recording videos simply by pressing the Volume Up key or the Volume Down key.


How to set the Volume key as the video-recorder key in the stock Camera app?
You can do so by using the following steps:
  1. Open the stock Camera app.
  2. Tap to open up the detailed settings menu.
  3. Scroll the settings menu to the very bottom.
  4. Tap Volume key and then select Record video.
  5. The Volume key has been set as the video-recorder key.

How to use the Volume key to record a video?
When you have set the Volume key as the video-recorder key, now you can use this key to start and end recording a video. See the following steps as the example:
  1. Open the stock Camera app.
  2. Aim the camera to the object.
  3. To start recording video, press the Volume Up key or the Volume Down key.
  4. Since there's no key that can be used to pause or resume the recording. If you want to do so, you can use the on-screen icon by tapping to pause the recording and tapping to resume the recording.
  5. To end recording video, press the Volume Up key or the Volume Down key.

Samsung Galaxy S5: How to Record Video Using Voice Command in Android 4.4.2 Kitkat

For any reason, if you want to be able to start recording videos without you have to tap any on-screen video-recorder icon or press any physical button, you can alternatively do so by using the default voice command for recording video that is available in the stock Camera app. Unfortunately, there's no voice command to pause/resume/end recording videos so that you have to do so manually.


How to enable the voice command feature for recording videos in the stock Camera app?
Since this feature is not enabled by default, you have to enable this feature first before you can use it to record videos by using the following steps:
  1. Open the stock Camera app. You can speed up the way you access the stock Camera app by enabling the camera shortcut in the lock screen.
  2. Tap to open the detailed settings menu.
  3. Scroll the settings menu to the very bottom.
  4. Tap Voice control to enable the voice command feature for recording videos.
  5. A window will pop up to show you the voice command that can be used to record videos. The default voice command to record video is "record video".


How to use voice command to record a video?
When the voice command feature for recording video has been enabled, now you can use it to start recording videos. See the following steps as the example:
  1. Open the stock Camera app.
  2. Aim the camera to the object.
  3. Say "record video" to start recording the video.
  4. If needed, you can pause the recording by tapping and then resume the recording by tapping .
  5. Tap to stop recording video.

Samsung Galaxy S4: How to Enable and Use Cover to Mute/Pause in Android 4.4 Kitkat

Samsung has provided some motion features to their users in order to help them controlling and interacting with their phone easier and faster. One of the motion features available is the turn over to mute/pause that you can use to mute incoming calls, alarms and to pause media playback by turning over the phone so that the screen will face downward.

See also: How to Enable and Use Turn Over to Mute/Pause in the Samsung Galaxy S4 with Android 4.4 Kitkat

If you notice, there's also a motion called cover to mute/pause that has the similar function with turn over to mute/pause. You can use both of them to mute incoming calls and alarms as well as to pause the media playback. The difference is turn over to mute/pause works when you turn the device over, while cover to mute/pause works when you cover the screen with your palm. Since this option is not enabled by default, then you have to enable it first if you want to use it on your phone.


How to enable or disable cover to mute/pause feature?
Below are the steps to do so:
  1. Go to Settings.
  2. Tap My device tab.
  3. Scroll down to find Motions and gestures, and then tap it.
  4. Swipe the ON/OFF switch next to Palm motion to the right to enable this option.
  5. Tap Palm motion.
  6. Depending on your current settings, tap the ON/OFF switch next to Mute/Pause to enable or disable this option. When the switch is on the right side or turns green means this option is enabled. When this option is enabled, you can tap this option and then tap Try it button to try this feature on the short tutorial given by this phone.

How to use cover to mute/pause feature?
Generally you can use this feature to mute sound or pause the playback without putting the phone into the silent mode. Here's the example:
  1. Muting the sound
    While your phone is playing sound for an incoming call or an alarm, cover the screen using your palm to mute the sound.
  2. Pausing the media playback
    While your phone is playing video or music, on any screen, cover the screen using your palm to pause the playback. FYI, this function also works while the video is being viewed in the pop up window.

Please note that you can't use this feature to pause media playback if the screen is off or while you're using headsets. I personally prefer to use cover to mute/pause to mute sound or to pause playback than turn over to mute/pause, because this motion is simpler to be used. So, how about you? Which mute/pause motion do you like best?