Showing posts with label S4 with Android 5.0. Lollipop. Show all posts

Samsung Galaxy S4: How to Share Your Namecard via Bluetooth in Android 5.0.1 Lollipop

The stock Contacts app in your Samsung Galaxy S4 has a feature that will let you create your own name card so you can save your personal information, e.g: name, phone number, etc. When needed, you can easily share your name card to others via Bluetooth.


How to share your name card via Bluetooth?
You can do so by using the following steps:
  1. Open Contacts app.
  2. Tap the Contacts tab. All your contacts will be displayed here.
  3. Tap your name card (it's located at the top of the contact list).
  4. Tap the Menu key and then select Share name card.
  5. Tap Bluetooth. If Bluetooth in your phone is off, tap Turn on button to turn it on.
  6. Assuming that the device you want to share your name card with has been paired with yours, tap the device name to select it.
  7. When the selected device has accepted your file transfer request, your name card will be sent shortly.

Samsung Galaxy S4: How to Create Your Namecard in Android 5.0.1 Lollipop

Aside from letting you to create and manage your personal or business contacts, the stock Contacts app in your Samsung Galaxy S4 also lets you to create and manage your name card. You can use this feature to save your name, mobile phone number, home phone number, email address, address, website, and more. This can be alternative way you can use when you need to know your phone number or other information. When needed, you can also easily send your name card to others by using one of the share methods available in your phone, e.g: Bluetooth, messages, etc.


How to create your name card?
You can do so by using the following steps:
  1. Open Contacts app.
  2. Tap the Contacts tab. All of your contacts will be displayed here.
  3. Tap Set my profile (it's located at the top of the contact list).
  4. Enter your own personal information, e.g: name, mobile phone number, home phone number, address, email address, etc.
  5. If you'd like to add photo to your name card, do as follows:
    • Tap .
    • Tap Image and then select the required photo from Gallery.
    • If needed, you can adjust the area of the selected photo you want to set as the photo contact.
    • Tap Save button.
    • The selected photo has been set as the photo contact.
  6. Tap Save button to save your name card.
  7. Your name card has been created and added to the contact list.

Samsung Galaxy S4: How to Edit or Delete a VPN Profile in Android 5.0.1 Lollipop

There's a reason why you might need to edit or delete a VPN profile you had added in your phone, for instance: when you want to change its name or type, when you want to remove unused VPN profile, or when you want to turn off your lock screen so you have to delete all of your VPN profiles.


How to edit or delete a VPN profile?
You can do so by using the following steps:
  1. While your phone is unlocked, swipe down the top of the screen to open up the notification panel and then tap at the top right to go to the settings menu.
  2. Tap Connections tab.
  3. Tap More networks.
  4. Tap VPN. All VPN profiles you have added will be displayed here. To edit a VPN profile go to the step #5, while to delete a VPN profile go to the step #6.
  5. Edit a VPN profile:
    • Long tap the required VPN profile.
    • Tap Edit network.
    • Now you can edit the values within the selected VPN profile, e.g: VPN name, VPN type, VPN server address, etc.
    • Tap Save button to save the changes.
  6. Delete a VPN profile:
    • Long tap the required VPN profile.
    • Tap Delete network.
    • The selected VPN profile has been deleted.

Samsung Galaxy S4: How to Use VPN in Android 5.0.1 Lollipop

In Samsung Galaxy S4, you're allowed to add VPNs (Virtual Private Networks) and connect to one of them. You'll have some benefits when using VPN, e.g: you can access your business or home network over Internet with more securely anywhere you are, you can have private browsing even when you're in the public network, you can access country-blocked websites by connecting to a VPN located in another country, etc.


How to add a new VPN profile?
Before connecting to a VPN, you have to add the VPN profile first in your phone. You can do so by using the following steps:
  1. While your phone is unlocked, swipe down the top of the screen to open up the notification panel and then tap at the top right to go to the settings menu.
  2. Tap Connections tab.
  3. Tap More networks.
  4. Tap VPN. As a note, if you turn off your lock screen or use swipe as your unlock method, you'll be asked to use another secure screen lock type, e.g: PIN, password or pattern. You just need to follow the on-screen instructions to complete the lock screen configuration.
  5. Tap at the top right to add a new VPN profile.
  6. Enter the desired name for your VPN profile in the Name field.
  7. By default, the VPN uses PPTP as the protocol type. You can change it if your VPN server uses another type.
  8. Enter the correct address of your VPN server (IP address or domain) in the Server address field.
  9. Tap Save button.
  10. The VPN profile has been added.


How to connect to a VPN?
Assuming that you have Internet connection(Wi-Fi or mobile data), you can connect to a VPN by using the following steps:
  1. Tap the required VPN profile.
  2. Enter your VPN username and password in the provided fields.
  3. If you don't want to enter the username and password each time you connect to this VPN profile, check the box in the left side of the "Save account information" option.
  4. Tap Connect button. If the username and password are entered correctly, you'll be connected to the selected VPN.
  5. Now, you can enjoy private browsing in your phone without you have to worry that there will be the one who know who or where you are.
  6. To disconnect your VPN, tap the VPN profile and then tap Disconnect button.

Samsung Galaxy S4: How to Quickly Enable the Priority Interruptions Mode via the Quick Settings Panel in Android 5.0.1 Lollipop

By default, the interruptions setting is set to Always interrupt which mean all notification sounds and vibrations will be allowed. But, if you want to allow some notifications and mute others, you can set your interruptions setting to priority interruptions mode so you can select the required notifications as your priority interruptions. Once you have configured your priority interruptions mode, you can quickly enable this mode via the quick settings panel. This will save you more time since you can skip some steps compared if you have to enable this mode via the general settings menu.


How to quickly enable the priority interruptions mode via the quick settings panel?
You can do so by using the following steps:
  1. While your phone is unlocked, swipe down the top of the screen using two fingers to open up the quick settings panel. Here all quick setting buttons will be displayed.
  2. Tap Always interrupt button . The button switches to Priority only and this icon is displayed in the status bar as a sign that the priority interruptions mode has been enabled.

Samsung Galaxy S4: How to Use Priority Interruptions Mode in Android 5.0.1 Lollipop

When you have updated your Samsung Galaxy S4 to Android 5.0.1 Lollipop, you'll have some new features in your phone, one of which is the interruptions feature that can be used to customize the notification sound settings in your phone. By default, this feature is set to Always interrupt which mean your phone will sound or vibrate for all notifications. However, if needed, you can set this feature to Priority only so you can set your phone to sound or vibrate for the selected notifications only.


How to enable the priority interruptions mode?
You can do so using the following steps:
  1. On any screen, swipe down the top of the screen to open up the notification panel and then tap at the top right to go to the settings menu.
  2. Tap My Device tab.
  3. Tap Sounds and notifications.
  4. Tap Interruptions.
  5. Tap When calls and notifications arrive and then select Only allow priority interruptions.
  6. Select Indefinitely if you don't want to set timer for the priority interruptions mode, or select the other option(For 8 hours, For 4 hours, For 3 hours, For 2 hours, For one hour, For 45 minutes, For 30 minutes or For 15 minutes) if you want to set timer for the priority interruptions mode. As the example, if you select For 45 minutes, then the priority interruptions mode will be turned off and switched to Always interrupt after it has been activated for 45 minutes .
  7. Tap Confirm button.
  8. The priority interruptions mode has been enabled and you'll see this icon is displayed in the status bar.


How to set priority interruptions?
When the priority interruptions mode is enabled, you can select the required notifications you want your phone to sound or vibrate for by using the following steps:
  1. While you're in the Interruptions menu, scroll down the screen to the Priority interruptions section.
  2. Here, you can enable the required options you want to set as priority interruptions:
    • Events and reminders: check the box next to this option to allow notification sounds or vibrations for S Planner events and personal reminders.
    • Calls: check the box next to this option to allow notification sounds or vibrations for incoming calls.
    • Messages: check the box next to this option to allow notification sounds or vibrations for incoming messages.
    • Allowed contacts: this option will be available if you have set Calls and/or Messages as priority interruptions. You can use this option to choose whose calls and/or messages will make your phone plays notification sounds or vibrates. You can select All to allow notification sounds or vibrations for all incoming calls and messages, Favourite contacts only to allow notifications sounds or vibrations for incoming calls and messages come from favourite contacts, or Contacts only to allow notification sounds or vibrations for incoming calls and messages come from those listed in your contacts list.


How to set schedule for the priority interruptions mode?
If needed, you can set your phone to automatically turn on and off the priority interruptions mode by using the following steps:
  1. While you're in the Interruptions menu, scroll down the screen to the Set priority interruption period section.
  2. Set the days:
    • Tap Days.
    • Select the required days within a week (Monday, Tuesday, Wednesday, Thursday, Friday, Saturday, Sunday) you want your phone to automatically turn on the priority interruptions mode.
    • Tap Done button to save the changes.
  3. Set the time:
    • Tap Start time to set the time you want your phone to automatically turn on the priority interruptions mode. Tap OK button to save the changes.
    • Tap End time to set the time you want your phone to automatically turn off the priority interruptions mode. Tap OK button to save the changes.

Samsung Galaxy S4: How to Enable and Use USB Tethering in Android 5.0.1 Lollipop

Samsung Galaxy S4 comes with some features that will let you share your phone's mobile data connection with other devices, one of which is the USB tethering feature. If you have a Windows computer, you can enable the USB tethering feature so you can use your phone's mobile data connection in your PC when these both devices are connected using the USB cable.

------------------------------------
Disclaimer: this post is written based on Samsung Galaxy S4 GT-I9500 runs with Android 5.0.1 Lollipop and the computer uses Windows 7 Professional 32-bit as the operating system.
------------------------------------


How to enable and use the USB tethering feature?
Assuming that you have enabled mobile data in your Samsung Galaxy S4, you can enable the USB tethering feature and then use its Internet connection in your Windows PC by using the following steps:
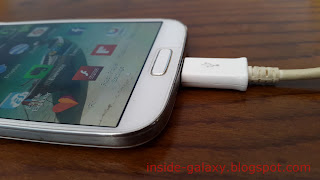
  1. Connect your phone to the computer using the provided USB cable by plugging the micro USB connector to the micro USB port in your phone (it's located under the Home key) and the USB connector to a USB port on your PC. If it's the first time for you to connect your phone with the PC, your PC may need a few minutes to install the driver.
  2. Now, open your phone's settings menu by swiping down the top of the screen to open up the notification panel and then tap at the top right to go to the settings menu.
  3. Tap Connections tab.
  4. Tap More networks.
  5. Tap Tethering and Mobile hotspot.
  6. Check the box next to USB tethering to enable this option. When the USB tethering feature is enabled, the tethering icon will be displayed in the status bar.
  7. If it's the first time for you to use the USB tethering feature with your PC, your PC may need a few minutes to install the driver.
  8. Once done, you can automatically use your phone's mobile data connections in your PC.

Samsung Galaxy S4: How to Manage Emergency Contacts in Android 5.0.1 Lollipop

Safety assistance is a life care feature that is designed to help you send emergency messages contain with your location and visual surroundings to your emergency contacts with ease. Given the function, it'd better if your emergency contacts are the ones who can provide a quick respond or help when you're in an emergency situation, e.g: your family member, your closest friend, etc. Fortunately, the safety assistance feature in Samsung Galaxy S4 lets you manage your emergency contacts so that you can easily add or remove your emergency contacts.


How to add or delete an emergency contact?
You can do so by using the following steps:
  1. On any screen, swipe down the top of the screen to open up the notification panel and then tap at the top right to go to the settings menu.
  2. Tap My device tab.
  3. Scroll down the screen and then tap Safety assistance.
  4. Scroll the screen to the very bottom and then tap Emergency contacts. To add an emergency contact go to the step #5, while to remove an emergency contact go to the step #6.
  5. Adding a contact to the emergency contacts list:
    • Tap Create primary contact .
    • Tap Create contact if you want to create a new contact and then add it to your emergency contacts list, or tap Select from contacts if you want to pick up a contact from your contacts list and then add it to your emergency contacts list.
    • The selected contact has been added to your emergency contacts list.
  6. Removing a contact from the emergency contacts list:
    • Tap at the top right.
    • Select the required emergency contact you want to remove.
    • Tap Delete button at the top right.
    • Tap Delete button to confirm.
    • The selected contact has been removed from your emergency contacts list.

Samsung Galaxy S4: How to Enable and Use Safety Assistance Feature in Android 5.0.1 Lollipop

Safety assistance is a life care feature available in Samsung Galaxy S4 runs with Android 5.0.1 Lollipop that can be used to help you send emergency messages to your emergency contacts. The message contains with your approximate location and visual surroundings taken using both the front and rear cameras.


How to enable the safety assistance feature?
You can enable and configure this feature by using the following steps:
  1. On any screen, swipe down the top of the screen to open up the notification panel and then tap at the top right to go to the settings menu.
  2. Tap My device tab.
  3. Scroll down the screen and then tap Safety assistance.
  4. Slide the ON/OFF switch to the right to enable the safety assistance. The switch turns green when it's enabled.
  5. If it's the first time, you'll be provided with the terms and conditions screen. Scroll down the screen to read it and then check all checkboxes to agree the terms and conditions, then tap OK button to continue.
  6. Since you have to register at least one emergency contact to make this feature works, you'll be asked to do so. Tap Add button to add your emergency contacts.
  7. Select Create contact if you want to create a new contact and then set it as emergency contact, or select Select from contacts to pick up contacts from your contacts list and then set them as emergency contacts.
  8. Once you have added your emergency contacts, press the Back key to return to the safety assistance menu.
  9. If you'd like to include pictures taken with the rear and front-facing cameras within your emergency messages, check the box next to the Send emergency pictures option to enable it.


How to use the safety assistance feature?
While you're in an emergency situation, tap and hold the Volume Up key and the Volume Down key for 3 seconds, your phone will turn on Wi-Fi, mobile data and GPS automatically and then send an emergency message contains with your current location as well as pictures of your surroundings that are taken using both the rear and front-facing cameras to your emergency contacts.

Samsung Galaxy S4: How to Fix Can't Forward a Text Message

Today, an insider asked me why he couldn't find the "forward" option when long pressing a text message in the stock Messaging app. He just had delete and copy text options. From what I know, the text messages forwarding feature is not available when we are in the easy mode. As we all know that the easy mode has simpler layout and disables some advanced features(including with the text messages forwarding feature) since it is designed for first smartphone users. Thus, if you want to be able to forward text messages, you have to use standard mode by disabling the easy mode.


How to disable the easy mode?
You can do so by using the following steps:
  1. While you're in the easy mode, swipe down the top of the screen using your finger to open up the notification panel and then tap at the top right to go to the easy settings menu.
  2. Tap Home screen mode .
  3. Select Standard mode and then tap Apply button.
  4. Tap OK button.
  5. The easy mode will be disabled and your phone will use the standard mode as the home screen mode.
  6. Now, you should find the forward option when long pressing a bubble message within a conversation in the stock Messaging app.

Samsung Galaxy S4: How to Delete Videos from a Windows Computer via Windows Explorer App

When your phone is connected to your Windows PC and being explored using Windows Explorer app, you can easily delete videos stored in your phone from this app to remove unwanted videos from your phone or to free up some space in your phone. If needed, you can backup your videos by transferring videos to your PC via Windows Explorer app before permanently deleting them from your phone.

------------------------------------
Disclaimer: this post is written based on Samsung Galaxy S4 GT-I9500 runs with Android 5.0.1 Lollipop and the computer uses Windows 7 Professional 32-bit as the operating system.
------------------------------------

How to delete videos stored in Samsung Galaxy S4 with Android 5.0.1 Lollipop from a Windows computer via Windows Explorer app?
As the example, we'll delete all videos stored in the DCIM\Camera folder in the internal storage of Samsung Galaxy S4 from a Windows PC via Windows Explorer app by using the following steps:
  1. Connect your phone to the computer using the provided USB cable by plugging the micro USB connector to the micro USB port in your device (it's located under the Home key) and the USB connector to a USB port on your PC. If it's the first time for you to connect your phone with the PC, your PC may need a few minutes to install the driver. By default, your phone will use MTP as the connection mode.
  2. When the phone has been successfully connected to your PC and is ready to use, a pop up window will appear on your computer. Click Open device to view files to automatically explore your phone in the Windows Explorer.
  3. Navigate to the DCIM\Camera folder in the internal storage of your phone by using these steps:
    • In the Windows Explorer app, click the Phone folder to explore the internal storage of your phone.
    • Click the DCIM folder.
    • Click the Camera folder. FYI, it's the default folder used to save all videos recorded by the stock Camera app.
  4. Since the DCIM\Camera folder contains with photos and videos, you can make it easier by sorting the files by its type. You can do so by clicking the right-mouse button and then hover the cursor above the Sort by and then select Type. Now, select all videos (those with .mp4 file extensions) within this folder.
  5. Delete the selected videos by pressing the Delete key in your PC's keyboard, or by clicking the right-mouse button and then select Delete.
  6. Click the Yes button to confirm deleting videos.
  7. All videos within DCIM\Camera folder in the internal storage of your phone will be deleted permanently.
  8. Once done, close the Windows Explorer app and then you can disconnect your phone from the PC by unplugging the USB cable from your phone and your PC.

Samsung Galaxy S4: How to Transfer Videos to a Windows Computer via Windows Explorer App

Transferring videos stored in your phone to other storage or devices periodically to backup them is a preventive thing that can be done to avoid you lose them since you can use the backup to retrieve videos when you accidentally lose them from your phone for whatever reason. If you have a Windows computer, you can transfer the videos from your phone to your PC by using the Windows Explorer app. You can use this way if you don't like transferring multimedia files from your phone to PC by using Samsung Kies 3 app.

------------------------------------
Disclaimer: this post is written based on Samsung Galaxy S4 GT-I9500 runs with Android 5.0.1 Lollipop and the computer uses Windows 7 Professional 32-bit as the operating system.
------------------------------------

How to transfer videos from Samsung Galaxy S4 with Android 5.0.1 Lollipop to a Windows computer via Windows Explorer app?
As the example, we'll copy and move all videos stored in the DCIM\Camera folder in the internal storage of Samsung Galaxy S4 to a Windows PC via Windows Explorer app by using the following steps:
  1. Connect your phone to the computer using the provided USB cable by plugging the micro USB connector to the micro USB port in your device (it's located under the Home key) and the USB connector to a USB port on your PC. If it's the first time for you to connect your phone with the PC, your PC may need a few minutes to install the driver. By default, your phone will use MTP as the connection mode.
  2. When the phone has been successfully connected to your PC and is ready to use, a pop up window will appear on your computer. Click Open device to view files to automatically explore your phone in the Windows Explorer app.
  3. Navigate to the DCIM\Camera folder in the internal storage of your phone by using these steps:
    • In the Windows Explorer app, click the Phone folder to explore the internal storage of your phone.
    • Click the DCIM folder.
    • Click the Camera folder. FYI, it's the default folder used to save all videos recorded by the stock Camera app.
  4. Since the DCIM\Camera folder contains with photos and videos, you can make it easier by sorting the files within this folder by its type. You can do so by clicking the right-mouse button and then hover the cursor above the Sort by then select Type. Now, select all videos (those with .mp4 file extensions).
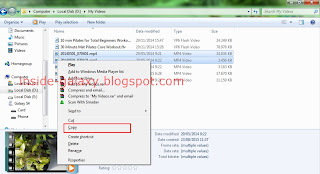
  5. If you'd like to copy the videos, use the keyboard shortcuts Ctrl+C, or click the right-mouse button and then select Copy. While, if you'd like to move the videos, use the keyboard shortcuts Ctrl+X, or click the right-mouse button and then select Cut.
  6. Now, navigate to a folder in your PC where you want to copy/move the selected videos and then paste them by using the keyboard shortcuts Ctrl+V, or click the right-mouse button and then select Paste.
  7. The videos will be copied or moved from the DCIM\Camera folder in the internal storage of your phone to the selected folder in your PC.
  8. Once done, close the Windows Explorer app and then you can disconnect your phone from the PC by unplugging the USB cable from your phone and your PC.

Samsung Galaxy S4: How to Add Videos from a Windows Computer via Windows Explorer App

If you'd like watching videos or movies stored in your Windows PC directly from your Samsung Galaxy S4, you have to transfer them first into your phone while it's being connected to your PC. You can easily transfer the required videos from your PC to your phone by using Windows Explorer app. This can be an alternative way if you don't like using Samsung Kies 3 app to transfer multimedia files between your phone and PC.

------------------------------------
Disclaimer: this post is written based on Samsung Galaxy S4 GT-I9500 runs with Android 5.0.1 Lollipop and the computer uses Windows 7 Professional 32-bit as the operating system.
------------------------------------

How to add videos from a Windows Computer to Samsung Galaxy S4 with Android 5.0.1 Lollipop via Windows Explorer App?
As the example, we'll copy some videos from a Windows PC to a new folder in the SD card in Samsung Galaxy S4 via Windows Explorer app by using the following steps:
  1. Connect your phone to the computer using the provided USB cable by plugging the micro USB connector to the micro USB port in your device (it's located under the Home key) and the USB connector to a USB port on your PC. If it's the first time for you to connect your phone with the PC, your PC may need a few minutes to install the driver. By default, your phone will use MTP as the connection mode.
  2. When your phone has been successfully connected to your PC and is ready to use, a pop up window will appear on your computer. Click Open device to view files to automatically explore your phone in the Windows Explorer app.
  3. Create a new folder in the SD card in your phone to save the videos by using the following steps:
    • In the Windows Explorer app, click the Card folder to explore the SD card of your phone.
    • Click the right-mouse button and then select New folder.
    • Enter the required name for the new folder and then press the Enter key in your PC's keyboard.
    • Click the folder you have just created to open it.
  4. Copy the required videos in your Windows PC by using the following steps:
    • Open a new Windows Explorer app and then navigate to the folder in your Windows computer where the videos you want to add to your phone are placed in.
    • Select the required videos and then copy them by using the keyboard shortcuts Ctrl+C, or click the right-mouse button and then select Copy.
  5. Paste copied videos into your phone by using the following steps:
    • Open the Windows Explorer app that you use to create a new folder in the SD card in your phone (see the step #3).
    • To paste the copied videos, use the keyboard shortcuts Ctrl+V, or click the right-mouse button and then select Paste.
    • The selected videos will be copied from your PC to your phone. Wait until the process is completed.
  6. Once done, close all Windows Explorer apps and you can disconnect your phone from the PC by unplugging the USB cable from your phone and your PC.
  7. Now, you can enjoy watching the videos that you have just added in your Samsung Galaxy S4 by using the stock Video Player app or any third-party Video Player app.

Samsung Galaxy S4: How to Delete Videos from a Windows Computer via Samsung Kies 3 App

While your Samsung Galaxy S4 is being connected to a Windows PC, you can alternatively delete unwanted videos stored in your phone by using Samsung Kies 3 app. If you'd like to backup your videos first, you can also use Samsung Kies 3 app to transfer your videos to your PC before deleting them.

------------------------------------
Disclaimer: this post is written based on Samsung Galaxy S4 GT-I9500 runs with Android 5.0.1 Lollipop and the computer uses Windows 7 Professional 32-bit as the operating system.
------------------------------------

How to delete videos in Samsung Galaxy S4 with Android 5.0.1 Lollipop via Samsung Kies 3 app in a Windows computer?
As the example, we'll delete all videos stored in the DCIM\Camera folder(it's the default folder used to save all videos recorded by the stock Camera app) in the internal storage of Samsung Galaxy S4 via Samsung Kies 3 app by using the following steps:
  1. Connect your phone to the computer using the provided USB cable by plugging the micro USB connector to the micro USB port in your device (it's located under the Home key) and the USB connector to a USB port on your PC. If it's the first time for you to connect your phone with the PC, your PC may need a few minutes to install the driver. By default, your phone will use MTP as the connection mode.
  2. When your phone has been successfully connected to your PC, launch Samsung Kies 3 app in your computer. If you have not installed this app yet, you can download it here and then install it in your computer.
  3. Samsung Kies 3 app will connect to your phone automatically.
  4. In the Kies screen, click Videos located at the left side menu to view all videos stored in your phone. By default, those videos will be grouped by the date.
  5. Click the By folder tab to group your videos by the folder.
  6. Click the box in the left side of the INTERNAL:\DCIM\Camera to select all videos stored in the DCIM\Camera folder in the internal storage of Samsung Galaxy S4, and then click at the top of the Kies screen.
  7. Click the Delete button to confirm deleting the selected videos.
  8. All videos in the DCIM\Camera folder in the internal storage of your phone will be deleted permanently.
  9. Once done, you can disconnect your phone from Samsung Kies 3 app by clicking in the right side of the device name in the Kies screen. Then, you can disconnect your phone from the PC by unplugging the USB cable from your phone and your PC.