Samsung Galaxy S3: How to Open Zip or Rar Files on Gmail Messages Attachment Using Free Applications

If you have been accustomed to communicating with someone using the email then you would have been familiar with the file attachment. With this feature you can add other files on your email that will be sent. Although Gmail by default only provide atachment for picture and video, with a little help from a certain app you can add any file types on your Gmail attachments.

See also: How to Attach Any File Types on Gmail Messages with Samsung Galaxy S3

Nowadays there are a lot of File Manager app that you can use to allow you attach any files on your Gmail messages both free or paid version, one of them is the ES File Explorer. The app is free and can be found easily through Google Play Store.

Image Credit: androidpit.com

After you were installed ES File Explorer on your Galaxy SIII, then you will also be able to open the attachment that contains the zip or rar files that are sent to your email.


How to open zip or rar files attachment on Gmail?
As written on webcazine.com, here are the steps you need to do:
  1. If ES File Explorer is already installed on your phone, then you simply tap the attachment to open up the zip or rar file inside it. Or if you do not already have this application you can download ES File Explorer via the Play Store and then install it on your phone by following the steps provided.
  2. Tap on zip or rar files to view it with the appropriate application or you can extract it first to the folder you want.
  3. If you do not get a response when tapping the attachment, then first of all you can download the attachment to the folder that you want by pressing the Save button.
  4. Launch ES File Explorer then browse the folder where you save the zip or rar files that you downloaded earlier to open it.
  5. Done.

It's easy, right? In addition to the methods mentioned above, you can also use other zip app available on Play Store to open the zip or rar file in your Gmail messages. So, try this useful method on your Gmail then share your experience here through the comment below :)

Samsung Galaxy S3: How to Insert or Remove Micro SD Card

Samsung Galaxy SIII comes with features that allow you to expand storage capacity using Micro SD Card. By adding this card in your phone, you can get the storage up to two times greater than its deafult. So, you can store any kind of data you want inside it such as your favorite music, applications, HD movies, HDR photos, etc..

See also: How to Take HDR Photos with the Samsung Galaxy S3

For some reason you may need to remove or insert it into your phone, for example, you want to replace your card with a new card. Yes, you can do this with ease, as well as other things that you can do with ease using this great phone.

Image Credit: androidqueries.com


How to insert new SD Card?
As written on technipages.com, below are the steps you need to do to insert the Micro SD card into your phone:
  1. Turn the device off.
  2. Remove the rear cover.
  3. Find the location of the SD card slot on the rear of the phone, this is usually located on the right side above the battery compartment.
  4. Gently slide your card into the card slot with the connector position face down. You should hear the card click as the sign that the card is properly installed.
  5. Replace the rear cover of your phone.
  6. Done. You have managed to insert new SD card into your phone.

How to remove the existing SD card?
For some reason you may want to remove the SD card from your phone. Well, you can also do it easily. Taken from the same source, below are the steps you need to do:
  1. Turn the device off.
  2. Remove the rear cover.
  3. Find the location of the SD card slot on the rear of the phone, this is usually located on the right side above the battery compartment.
  4. Push the card gently into the slot. You should hear the card click then eject it from the slot. It will allow you to easily removed it.
  5. Replace the rear cover of your phone.
  6. Done. You have managed to remove existing SD card from your phone.

The two methods mentioned above are very easy to do. By knowing how to insert and remove the SD card now you can expand your phone's storage or replacing the old card with the new ones. So, try this useful method on your phone then share your experience here through the comment below :)

Samsung Galaxy S3: How to Make It More Secure with Three Easy Ways

Nowadays phones are not only a gadget that is used to make calls or send messages, but it has been used for many other things. For those of you who are lucky to have great smartphone named Samsung Galaxy SIII then you will be able to do many things with this phone, such as make a call in various ways, send messages, send an email, social networking, play games, take pictures, even you can take screenshot of your phone's screen and much more.

See also: How to Take Screenshot on Samsung Galaxy S3

Given the current functions of the phone is very complex, it's very important for you to pay attention to your phone security. And you should thanks to Samsung who has been delivering a phone that allows you to do almost everything very easily, including to make your phone more secure.


How to make Samsung Galaxy SIII more secure?
Quoted from cnet.co.uk, you have several options to make your Samsung Galaxy SIII to be more secure, they are:

1. Using a screen lock
Some people may choose not to use it because they have to enter the pin before they can use it. But, for security reasons it is better if you use a screen lock on your phone because it can prevent unauthorized access.

In Samsung Galaxy SIII you can customize the lock screen as your liking and of course make your phone more secure. You can also easily change the lock screen background image and determine the way you want to unlock the lock screen on your phone.

See also: How to Customize Lock Screen on Samsung Galaxy S3

2. Using encryption for content on the phone and SD card
If you ever need extra security, you may be able to perform encryption on the content stored on your phone or SD Card. It would make anyone else unable to access your content without enter a master password which will be required when the phone is turned on or when SD card is mounted.

You probably would have taken more than an hour to perform the encryption and do not interrupt if it's not finished yet because it could cause you to lose some data that you have stored on your phone or on your SD Card. Although this takes time, but if security is a priority for you, then it's worth to do. You can find the encryption option in your phone by go to Settings-> Security-> Encrypt device.

3. Using remote controls
The one that makes this phone so great is because it comes with various useful features. One of them is the remote controls. This feature will allow you to determine the current locations of your phone, remotely lock and erase it. This is very useful feature if your phone is lost or stolen due to with this feature you can quickly determine the location of your phone and keep the data on your phone remains safe.

To use this feature you must first register for a Samsung account which will allow you to login to the Samsung website and use your phone remotely. It's free and you can do it quickly through your phone. Required for this process is an email address and password. To enable this go to Settings-> Security-> Remote controls.

Image Credit: floyd.ch

Well, you can use one or even all these three options mentioned above to make your beloved Samsung Galaxy SIII to be more secure. So, if your main priority is security, try it and share your experience to make your phone more secure by write them through the comment below :)

Samsung Galaxy S3: How to Turn On or Off Driving Mode

Using the Samsung Galaxy SIII you can do many things, from using it as a phone to make a call or send a messages up to use it to do the things you used to do using a desktop computer like sending emails, watch HD video, download any application etc. .

See also: How to Download and Install Apps Through Google Play Store on Samsung Galaxy S3

With so many capabilities and features inside it made this phone very attractive to many peoples. This phone even has the ability to keep you able to use this phone properly in a variety of conditions. One of the features that allow it to happen is the Driving mode. This feature allows you to stay using your phone without interrupting while you are driving.

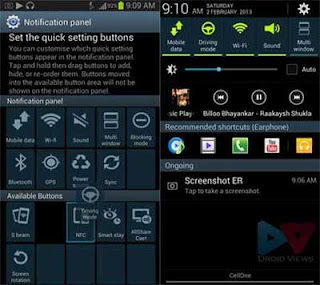
Image Credit: droidviews.com

When you enable this feature on your Galaxy SIII, then this feature will notify incoming call and read incoming messages out loud to you so you do not have to look at your phone while driving.


How to enable or disable Driving mode?
To use this feature you must first activate it on your phone. As written on technipages.com, here are the steps you need to do:
  1. Go to Apps through Home screen.
  2. Go to Settings.
  3. Tap on Language and input.
  4. Select Text-to-speech output.
  5. Find Driving mode setting located under General then slide it to On to enable this feature and select the items you want to be read to you, or you can slide it to Off to disable this feature completely.
  6. Done.

Well, now with this feature you do not have to worry to miss important calls or messages while you are driving. So, try these useful features and share your experience here through the comment below :)

Samsung Galaxy S3: How to Add Music and Video Files from PC

There are many ways you can do when you want to transfer music or video files from your computer into your Galaxy SIII, such as transfer directly from PC, using Samsung Kies, using Windows Media Player, using the memory card etc.

See also: How to Load Music from Samsung's Kies Software into Samsung Galaxy S3

From all these ways, transfer directly from the computer is the most widely used method because it does not require any app or any activation. Or you can call this method as a transfer from a PC through removable disk.

Image Credit: technipages.com


How to add music or video files directly from a computer?
As written on webcazine.com, below are the steps you need to do:
  1. Connect your phone with the PC using the USB cable.
  2. Once the device is connected, a USB icon will appears on notifications bar. Tap and drag the icon downwards to access the notification panel.
  3. Tap on Connected as a media device option and make sure that checkboxes on media device (MTP) option is checked. Now you can transfer any music or video files you want to your phone.
  4. On your computer, go to Window explorer. Here you should see your phone as a removable disk.
  5. Acces a removable disk (phone storage) on Window explorer, Here you should see Videos and Music folders.
  6. To transfer files, drag or copy and paste music or videos from your PC to these folders. Your phone will automatically recognize these files.
  7. Or you may create new folders under these two default folder if you want to make your files more organized or group on category you wish.
  8. Once you finish to transfer all music or video files you want, you can disconnect your phone with the computer and enjoy your favorite music through your Galaxy SIII.

Today, the need to listen to music is very important for many peoples. With so many ways that you can use to add music or videos from computer to your phone, now you can listen various kind of your favorite music. So, have you tried the method above to add music on your phone? If so, you can share your thoughts here through the comment below :)

Samsung Galaxy S3: How to Hide or Unhide Folders on Gallery App

Currently smartphone function not only to make calls or send messages, but now the device has been turned into a device that can do many things for you. Such as the Samsung Galaxy SIII, with a variety of capabilities and features inside it you can use it for various purposes such as downloading apps, sending emails, etc..

See also: How to Send Scheduled E-mail on Samsung Galaxy S3

In addition the device also comes with a huge storage and advanced cameras that allows you to take a lot of HDR photos and HD video and then save it on your Gallery app.

See also: How to Take HDR Photos with the Samsung Galaxy S3

But for some reason you do not want others to see the collection of your personal photo or video. Relax, with the Galaxy SIII you can easily hide the folder that contains the photograph or video in the gallery app on your phone.

Image Credit: webcazine.com


How to hide picture or video folder on gallery?
As written on webcazine.com, to be able to do this you just need to follow the easy steps below:
  1. For the record, you can rename the folder and add a "." in front of the name of the folder to make it invisible.
  2.  Go to Gallery app through Home screen.
  3. Long tap on the folder you want to hide.
  4. Tap on the Option key and select Rename.
  5. Enter a full-stop in front of the folder name and then tap OK.
  6. Finish. Now the folder that you want has been hidden.

How to unhide a hidden picture or video folder on gallery?
  1. If you have previously managed to hide a folder that you want, then you can also unhide the folders back. Go to My Files app through Home screen.
  2. Tap on the Option key and select Settings.
  3. Tick on the checkbox Show hidden files option.
  4. Now all hidden folders will unhide.
  5. Rename the folder name by removing the "." on the front of its existing name to make it visible.

Well, the two methods mentioned above are very easy to do and no need of third-party app required. So, you can try these methods directly on your phone and then let me know your experience by write them through the comment below :)

Samsung Galaxy S3: How to Attach Any File Types on Gmail Messages Using Free Applications

The one that appeals to many people to buy a smartphone is because these devices have capabilities that similar to a desktop computer, but in a smaller form and mobile. Smartphones can do almost anything that can be done by computer, one of which is the ability to check and send email directly or scheduled whenever you want.

See also: How to Send Scheduled E-mail on Samsung Galaxy S3

In addition, you can also add a file attachment in your email message. But, unfortunately Gmail only provides attachment for picture and video only. So what if you want to attach another file in Gmail message? Just relax, all these problems can be solved easily. You should say thanks to Google Play Store which has been providing a thousand of free or paid app that suits your needs that you can get with ease, including the app that will allow you to attach any files you want on Gmail messages.

See also: How to Download and Install Paid Applications on Samsung Galaxy S3

There are many File Manager app that you can get for free on Play Store to allow you attach any files such as: ES File Explorer and Astro File Manager. For this example we are using ES File Explorer.

Image Credit: androidpit.com


How to attach any file on Gmail?
As written on webcazine, here are the steps you need to do:
  1. Donwload install ES File Explorer which you can get for free through Google Play Store.
  2. Once you finished the install file manager app, go to the Gmail app through your Samsung Galaxy SIII Home screen.
  3. Here you can compose a new email.
  4. Tap on the Options button located next to the Home button and then select Attach picture.
  5. On the Choose type of attachment prompt you will see a file manager app that you have installed earlier.
  6. Select ES File Explorer then select the file that you want to attach on your email.
  7. Done. Now you have managed to attach any file in your Gmail messages.

This method is very easy to do. With a file manager app installed on your phone, now you can send an email with an attachment that contains any files you want. So, try this method and share your experience here through the comment below :)